Plugin / Gravity Forms Signature Add-On
Approve Me
Screenshots
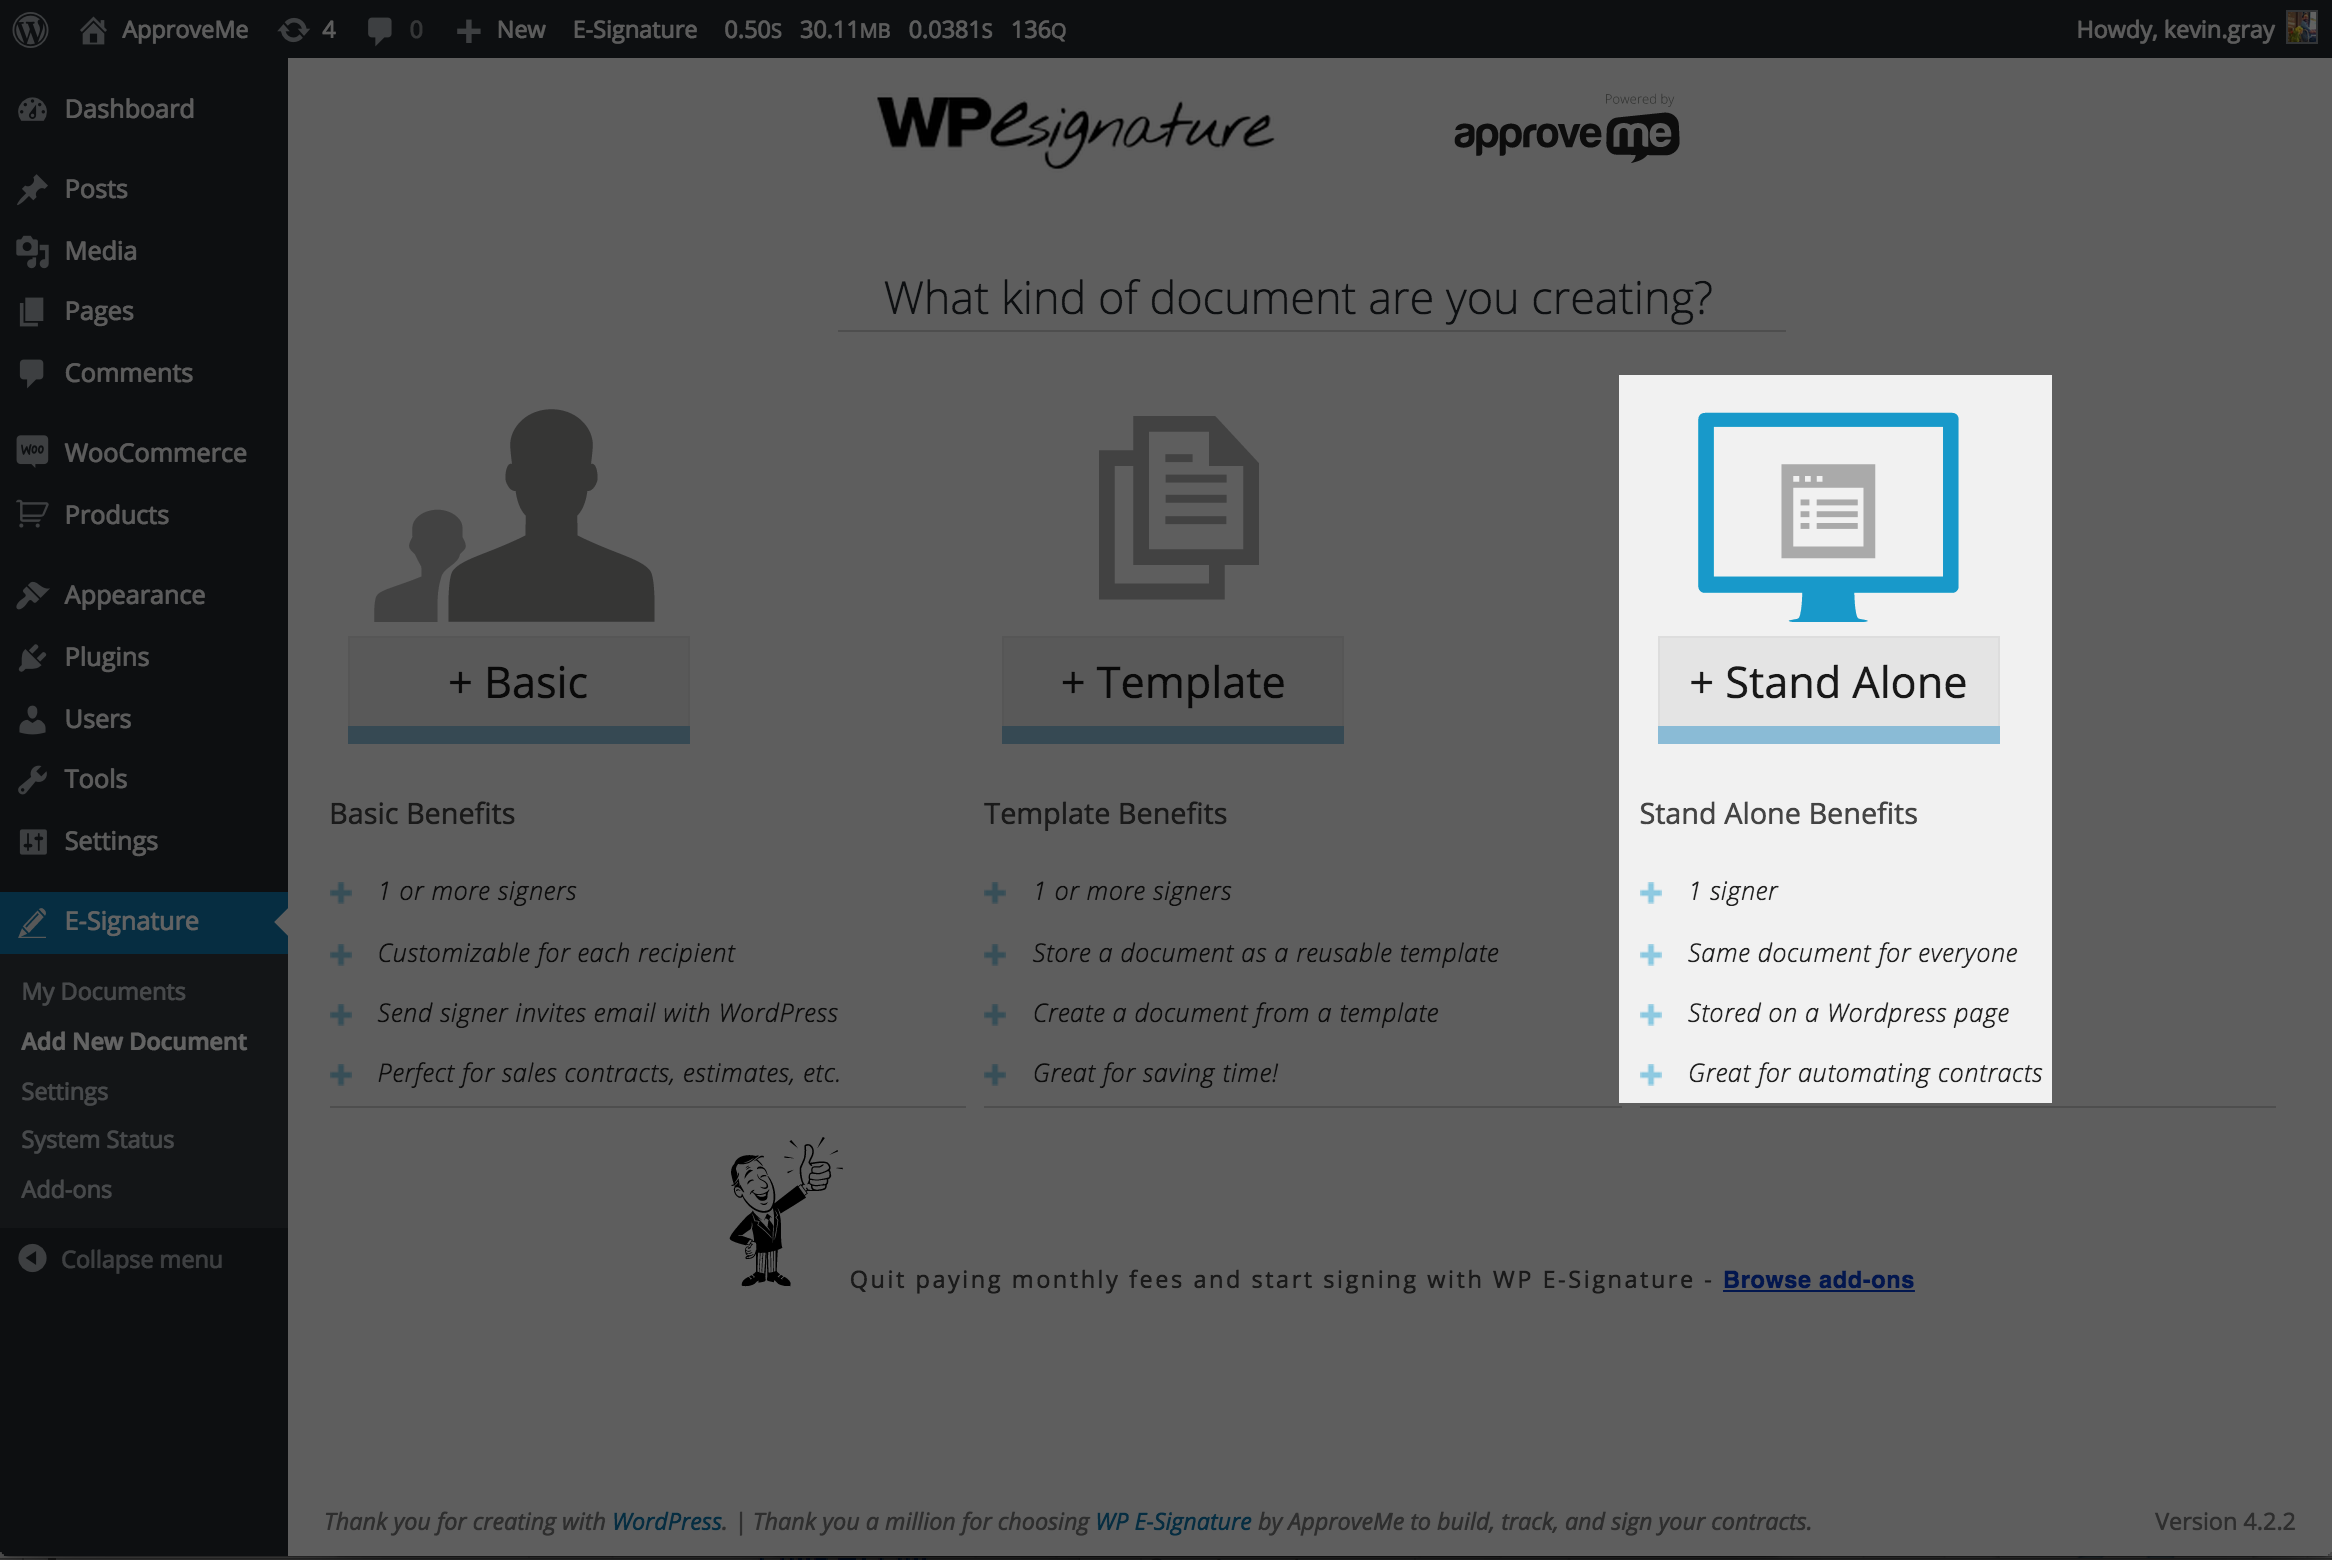
Add New Document: Once you’ve installed the WP E-Signature, you just need to draft up a new “Stand Alone Document”
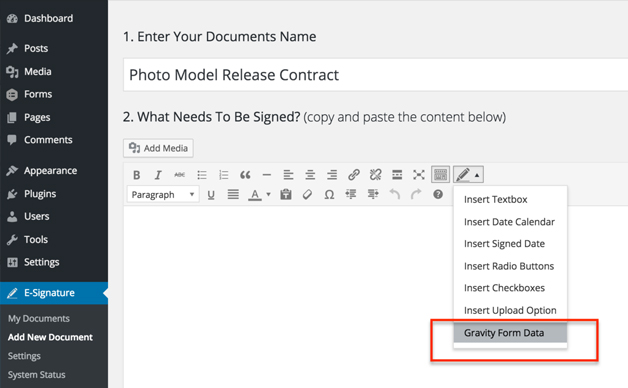
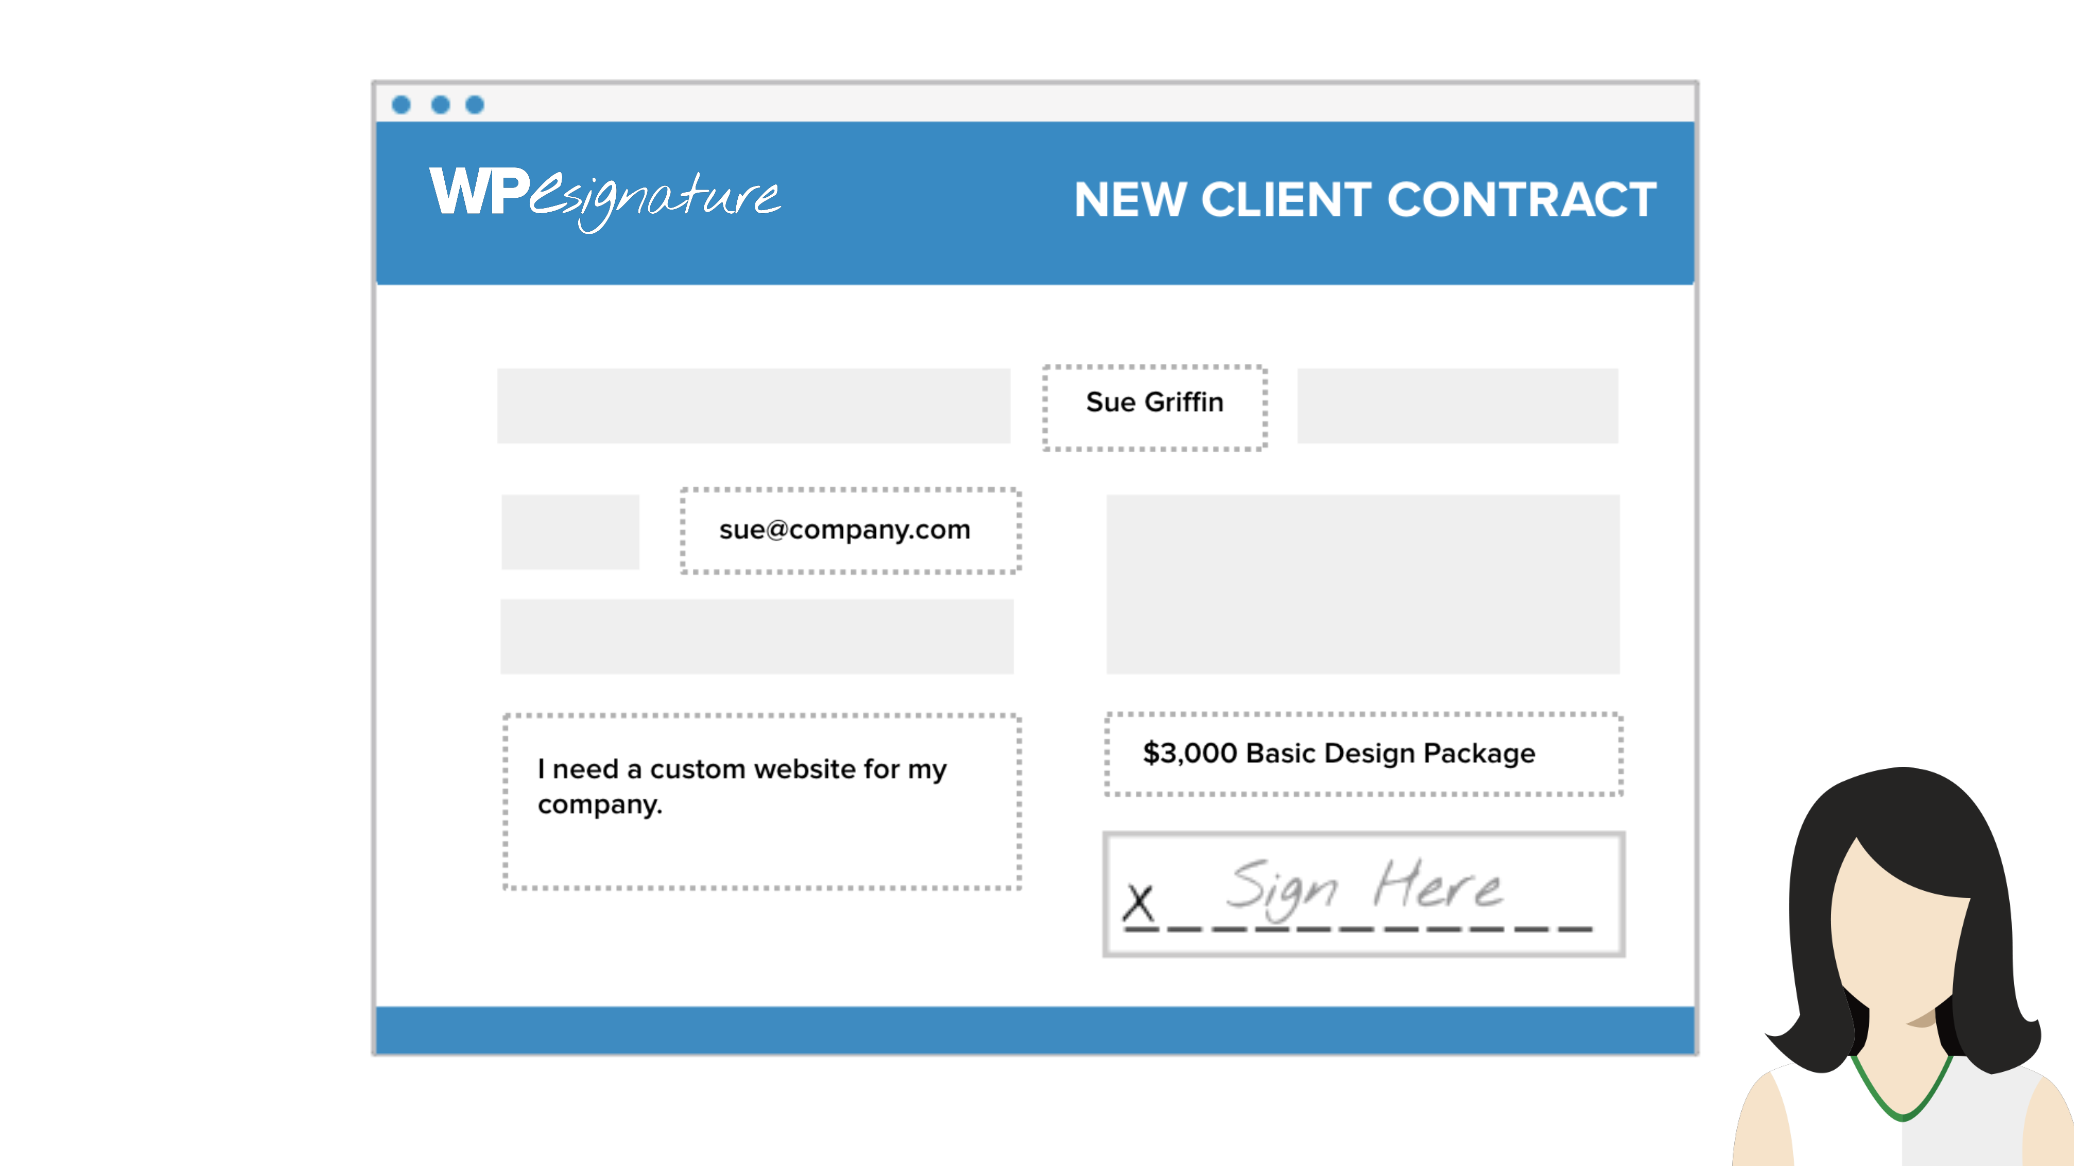
Gravity Form Data If you click the Signer Input Fields icon you will see the option “Gravity Form Data” you will need to click this in order to connect a gravity Form to this contract.
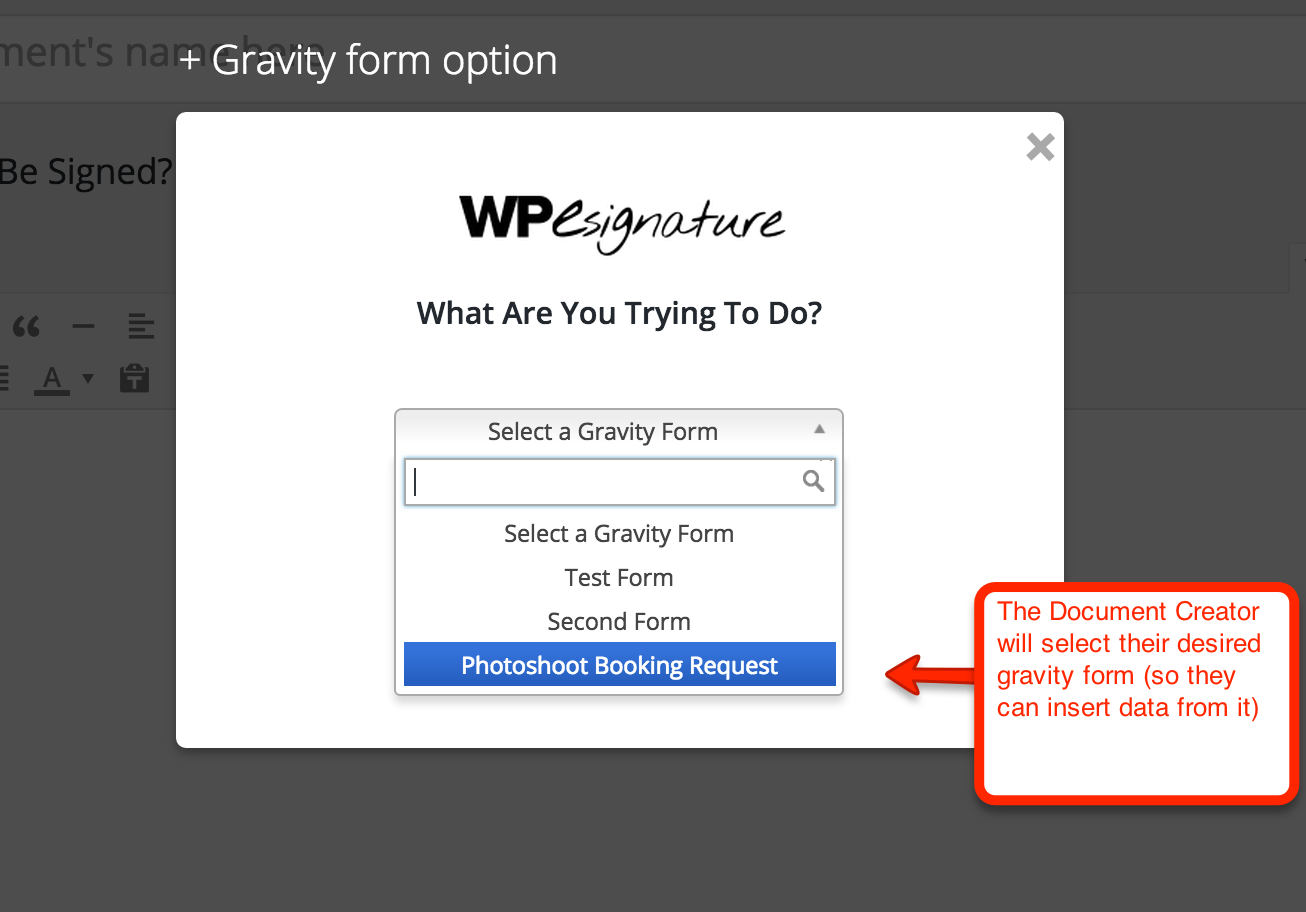
Select Your GravityForm: If you already have your gravity form created you can easily insert dynamic field data (from the gravity Form that is being submitted/triggering this contract) by selecting the Gravity Form.

Choose Your Gravity Form Fields: Once you’ve selected your Gravity Form you will see the available field options from this particular Gravity Form. You can easily insert the submitted results from your gravity Form in ANY place throughout this contract that you are creating.
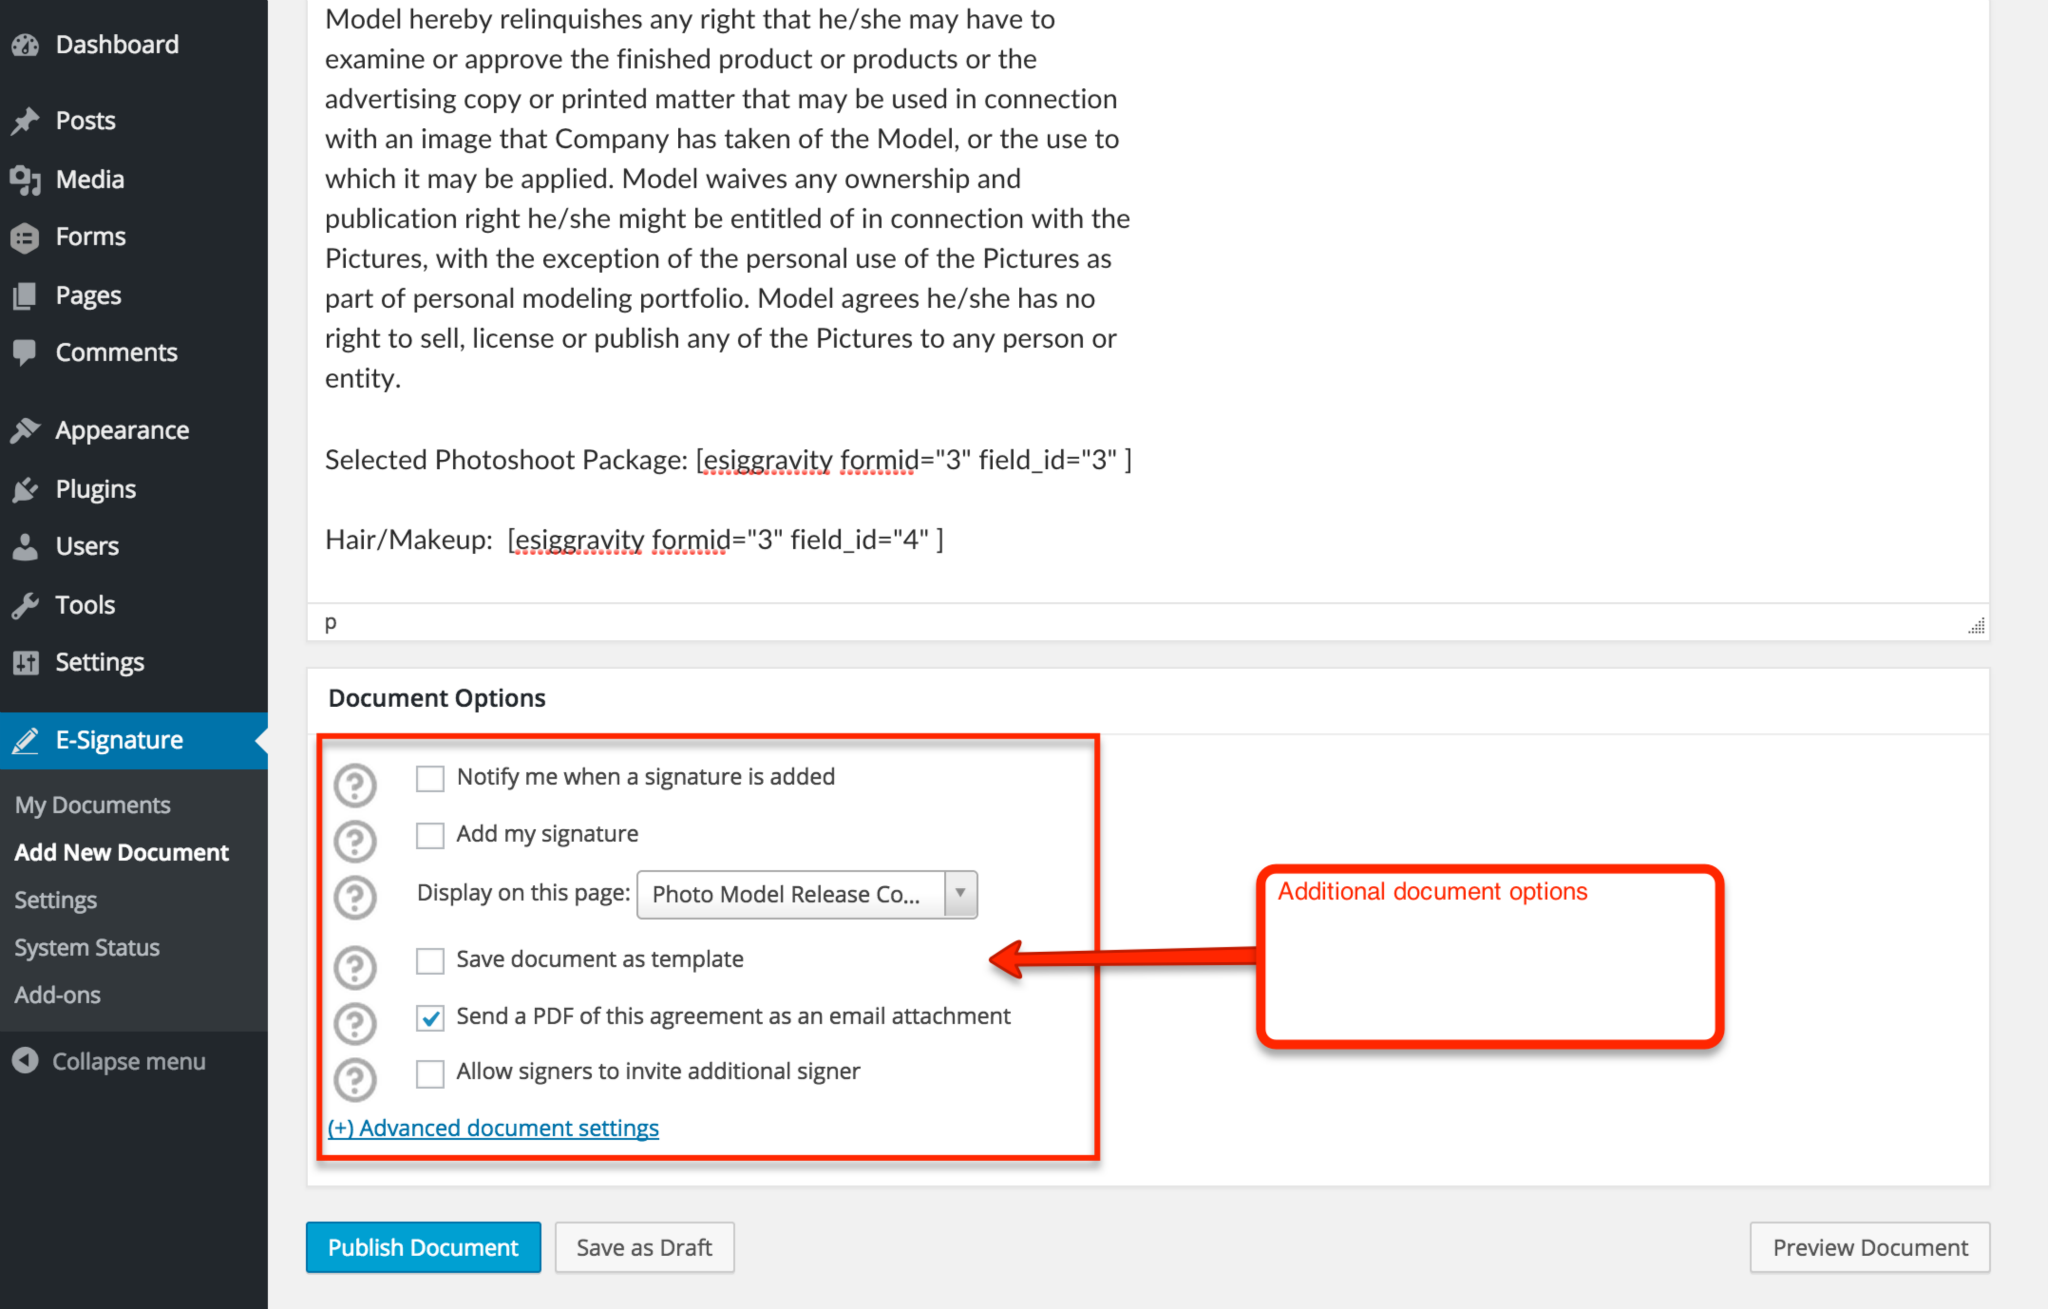
Document Signing Options (optional): WP eSignature by ApproveMe is a powerful eSignature tool filled with LOTS of customizable options i.e. Signing reminder Emails, Attach PDF to emails, Dropbox Sync, Auto Register WordPress Users, and TONS more. To read all about the available add-on features (which come with the business license) you can checkout: https://www.approveme.com/wp-esignature-features
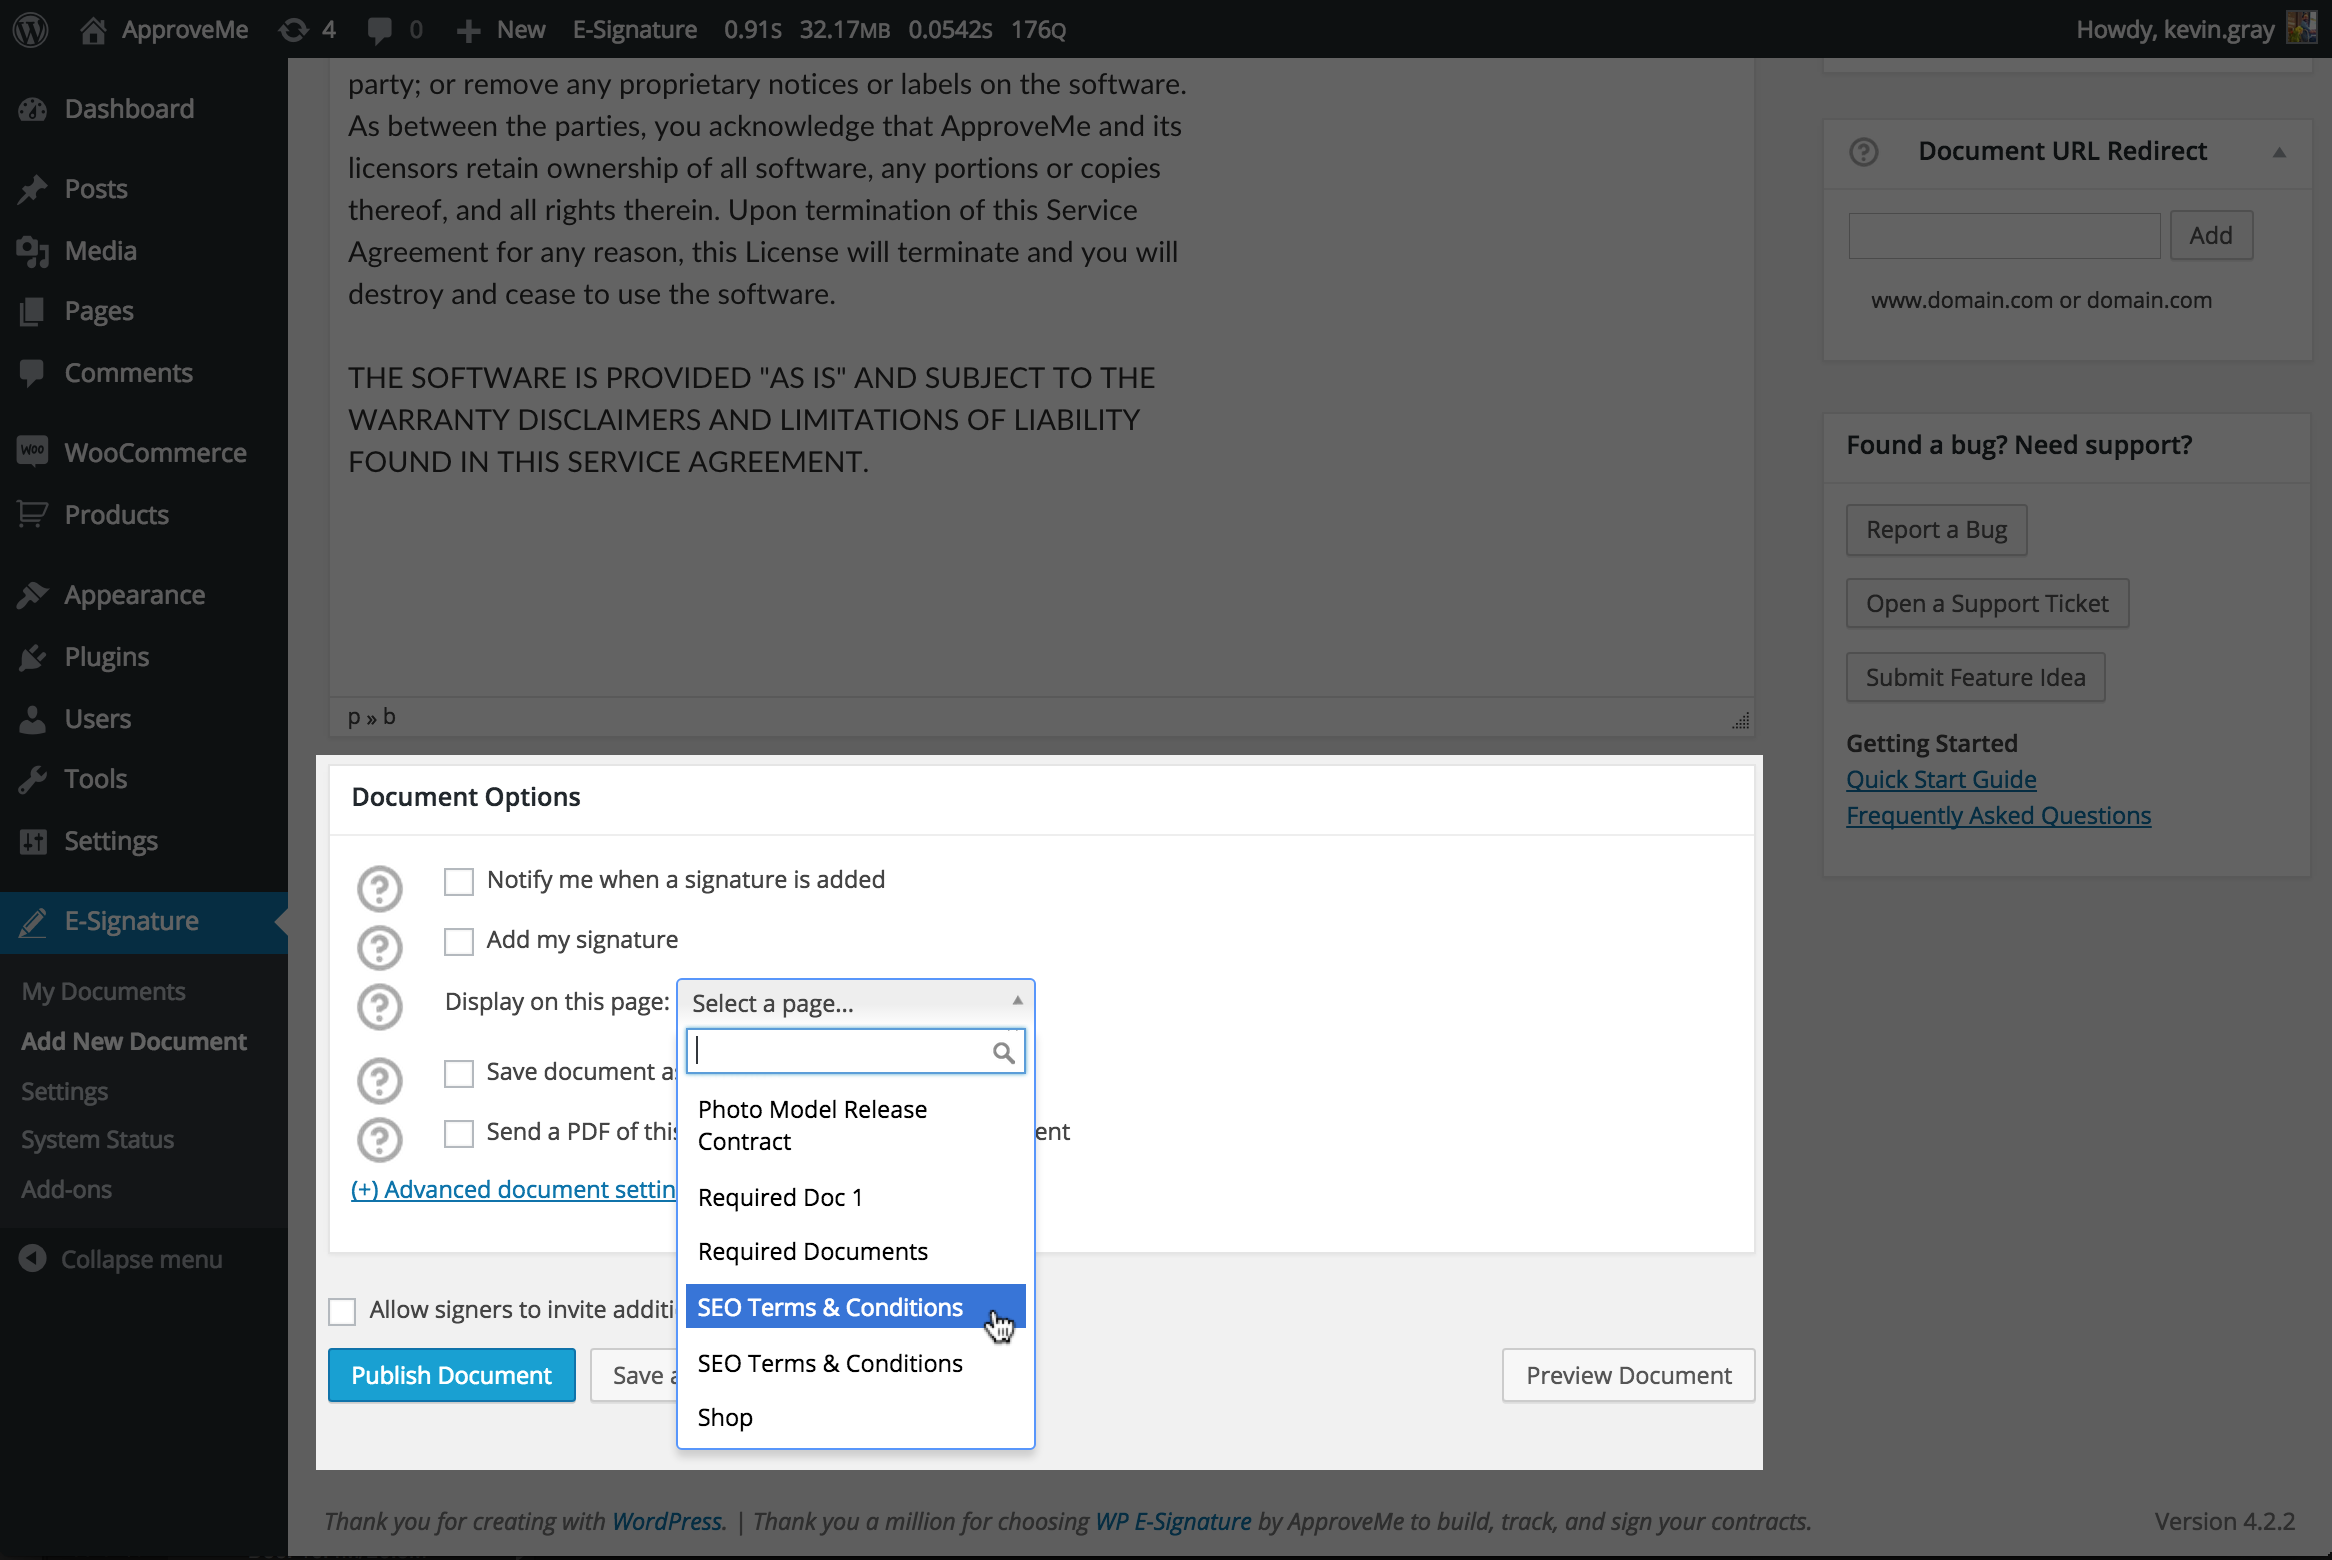
Connect Your Document to a Page:Once you have customize your contract to taste you will need to select a BLANK WordPress page to attach this document to. Do not include this page in your Nav menu since all of the magic actually happens after the Gravity Form is submitted (there’s no need to link to this page because the user will either be emailed a custom link or they will be automatically redirected once the gravity Form is submitted).
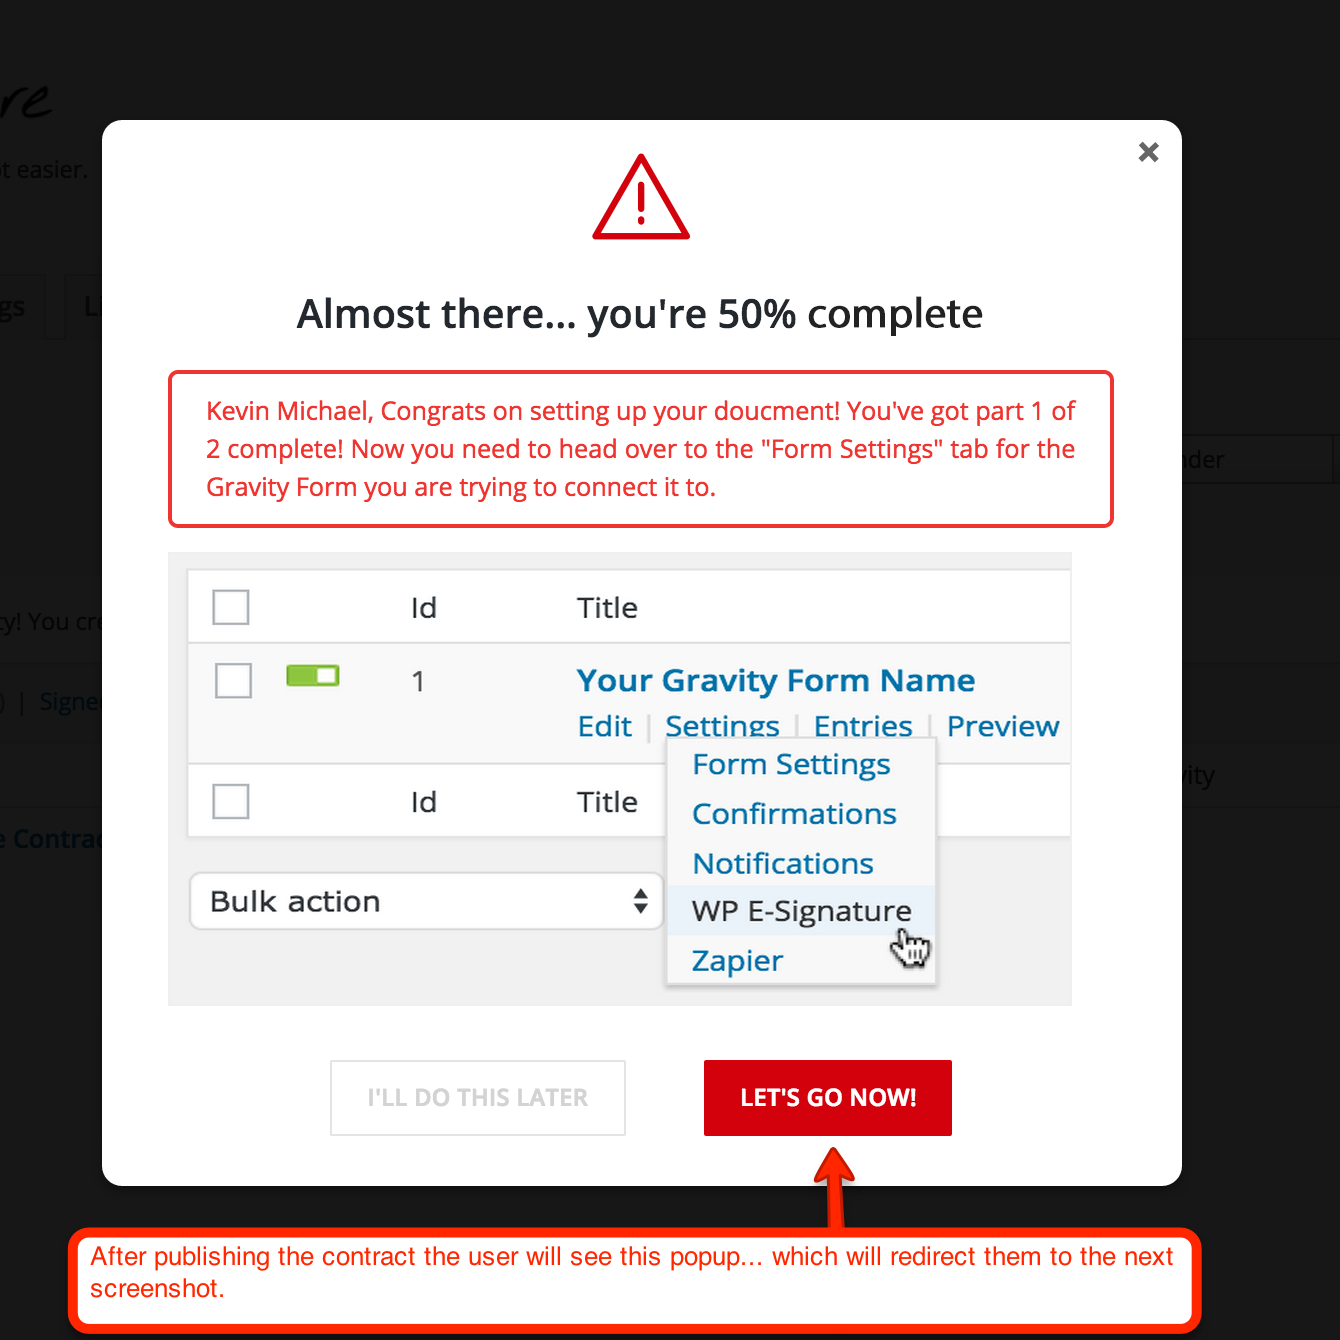
Click “LET’S GO NOW”: After you have published your contract you will need to connect your Stand Alone Document to your Gravity Form. This is pretty straight forward. Just click the button “LET’S GO NOW!” to be redirected to the actions/trigger tab for your specific Gravity Form.
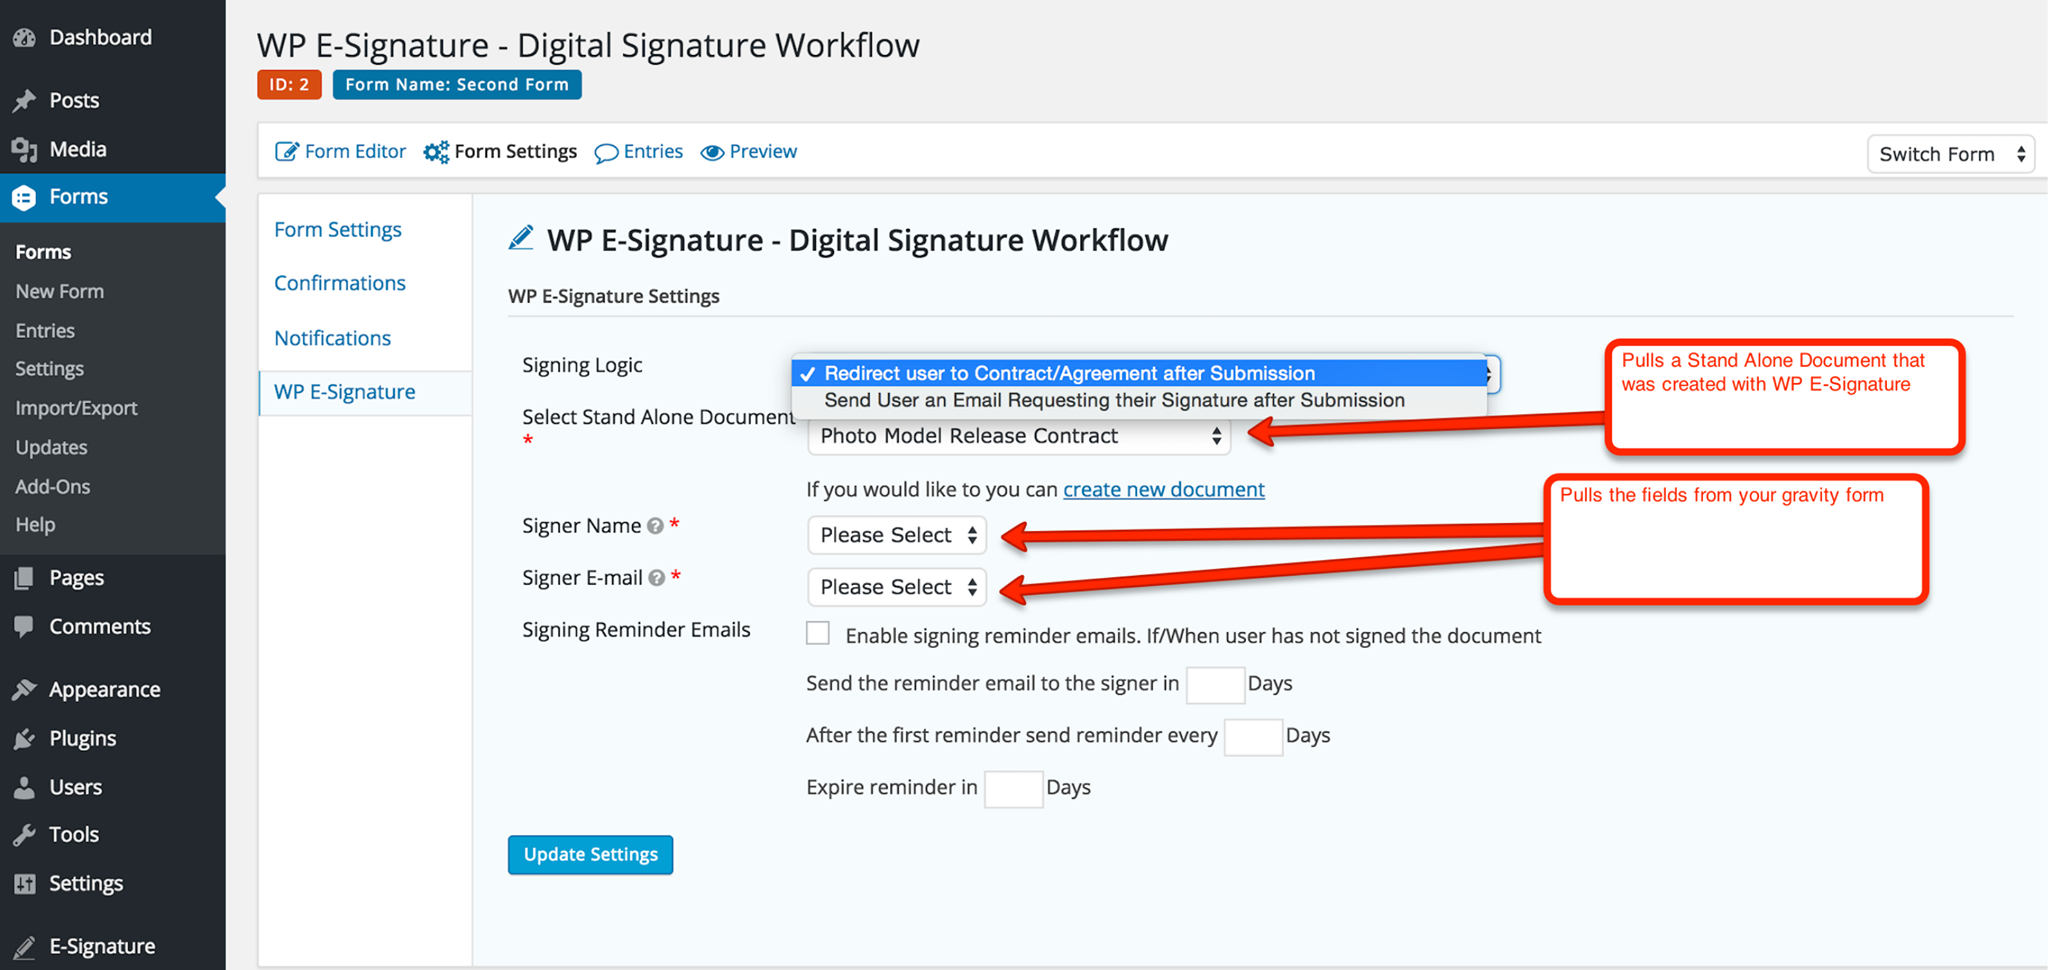
Define Your Signing Logic: This is the page (inside of Gravity Forms) that needs to be customized. Please choose the Signers Full Name and the Signers Email address along with any other additional/advanced eSignature settings you’d like for your contract.
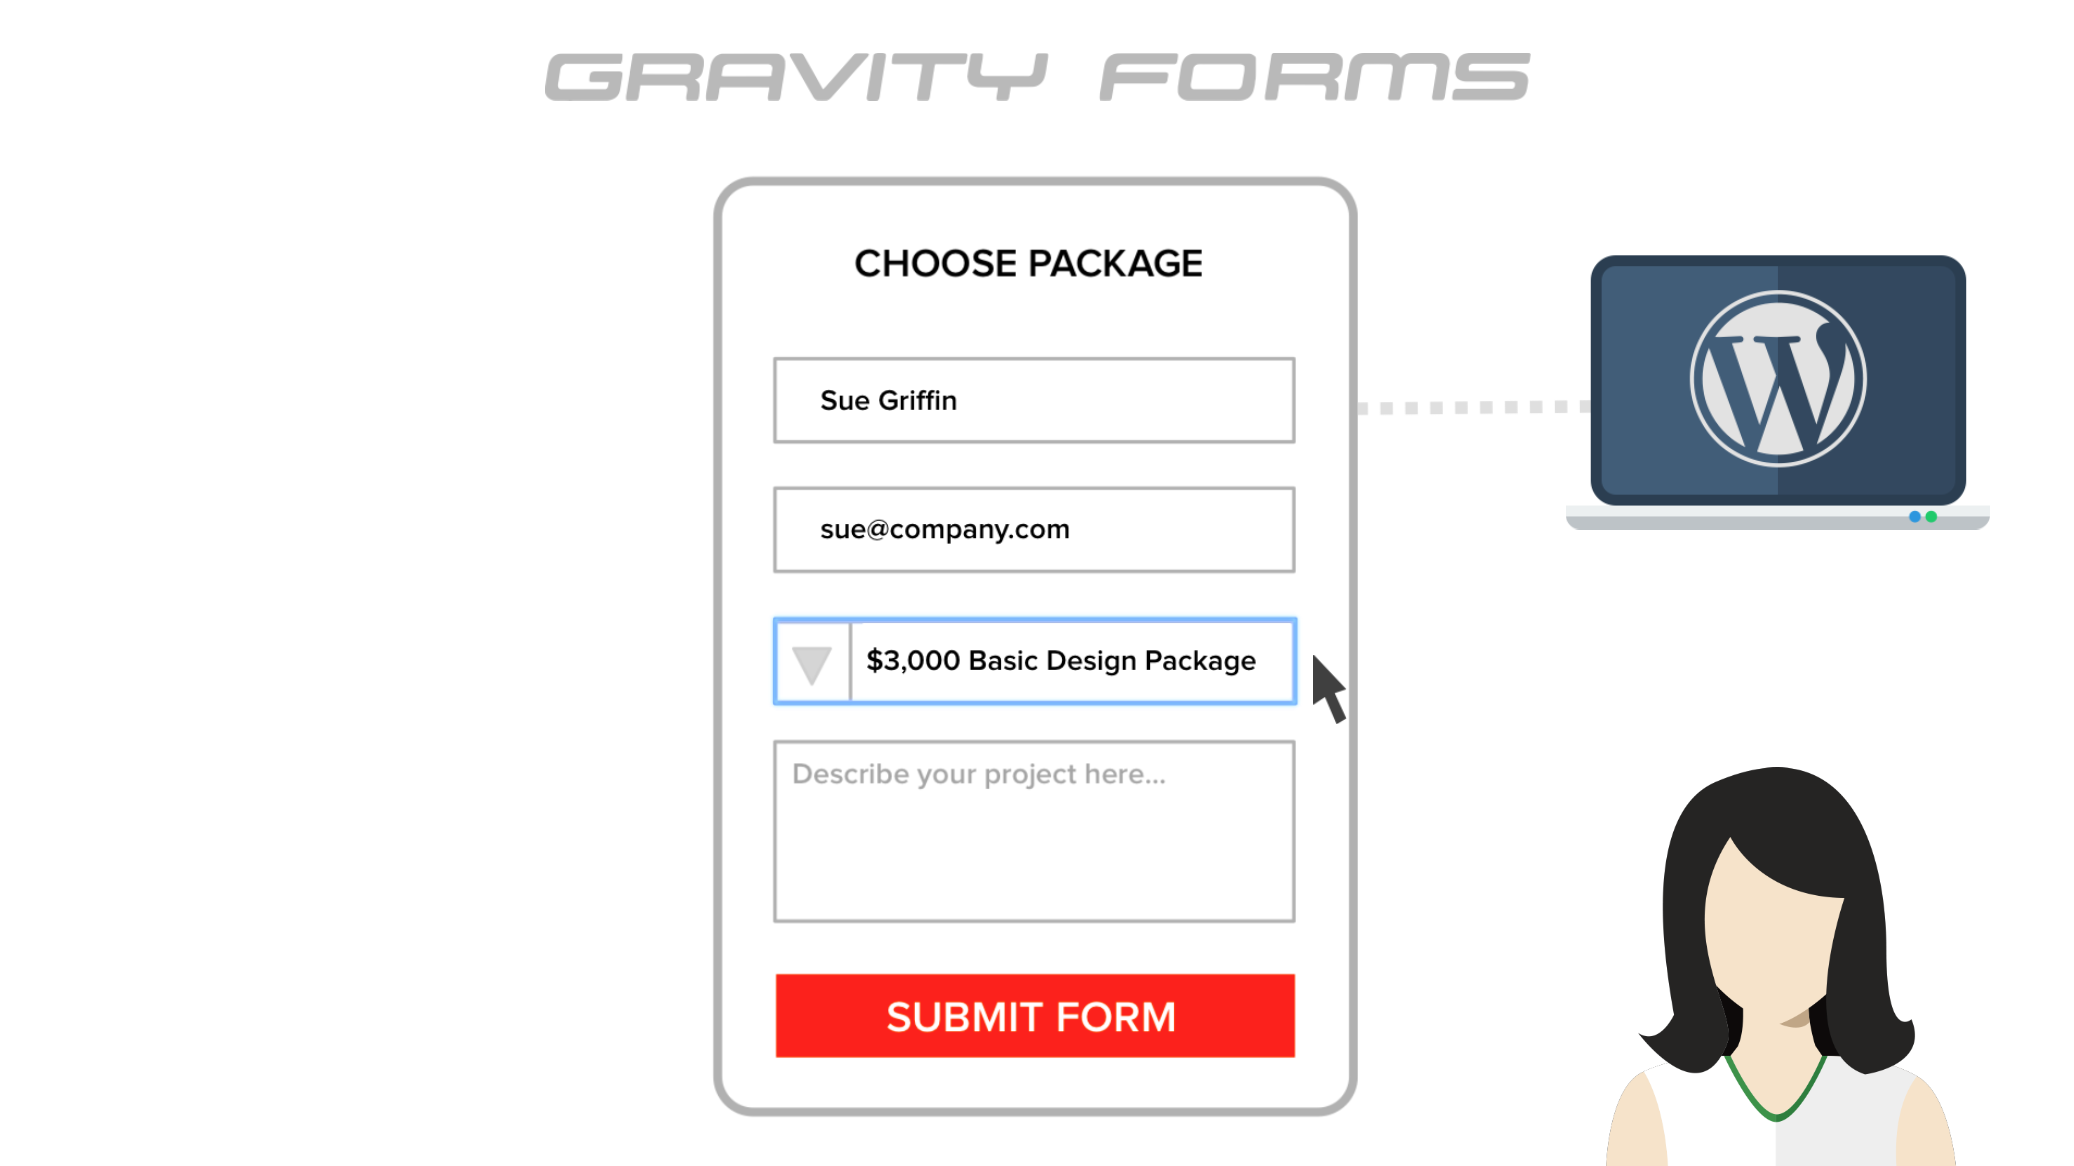
User Submits a Gravity Form Once a user submits the Gravity Form that you connected to your WP eSignature contract they will either be redirected to the contract immediately or emailed a invitation to signer their specific/custom contract that includes details from the submitted Gravity Form.
Review & eSign: Your users will review the contract and add their signature to the contents of the contract.
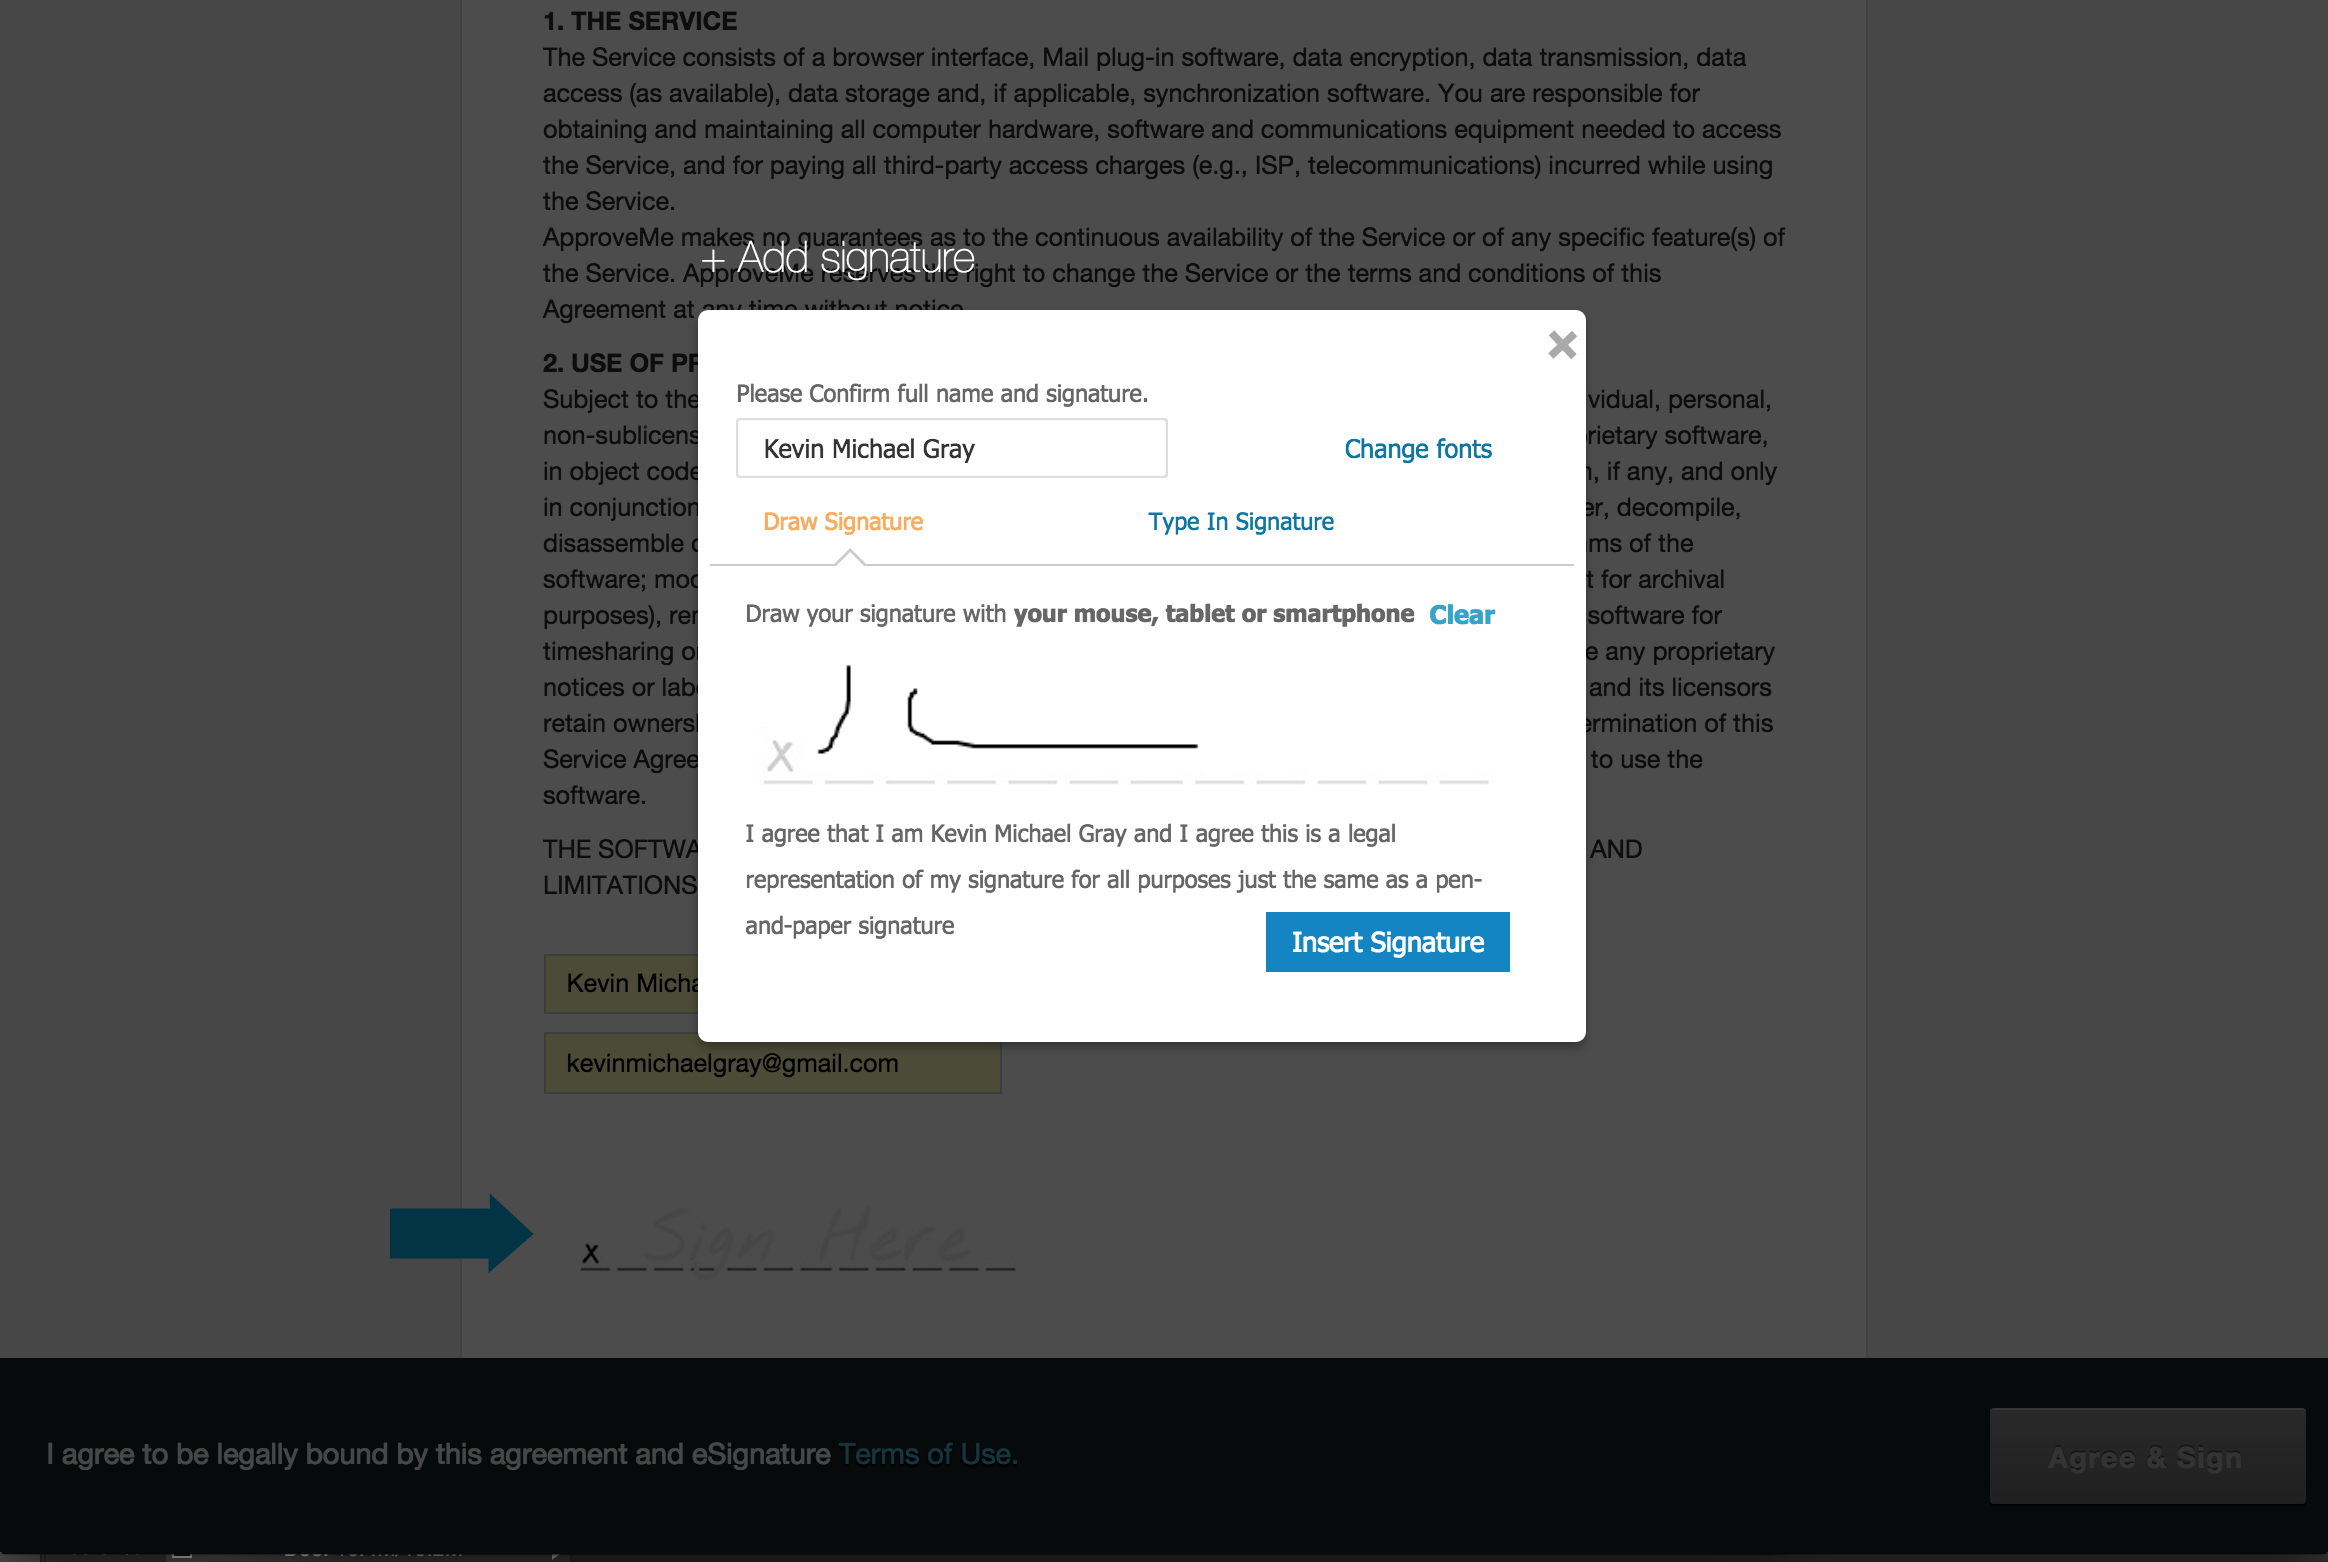
Select a Digital Signature:Signers can choose a typed or digital signature
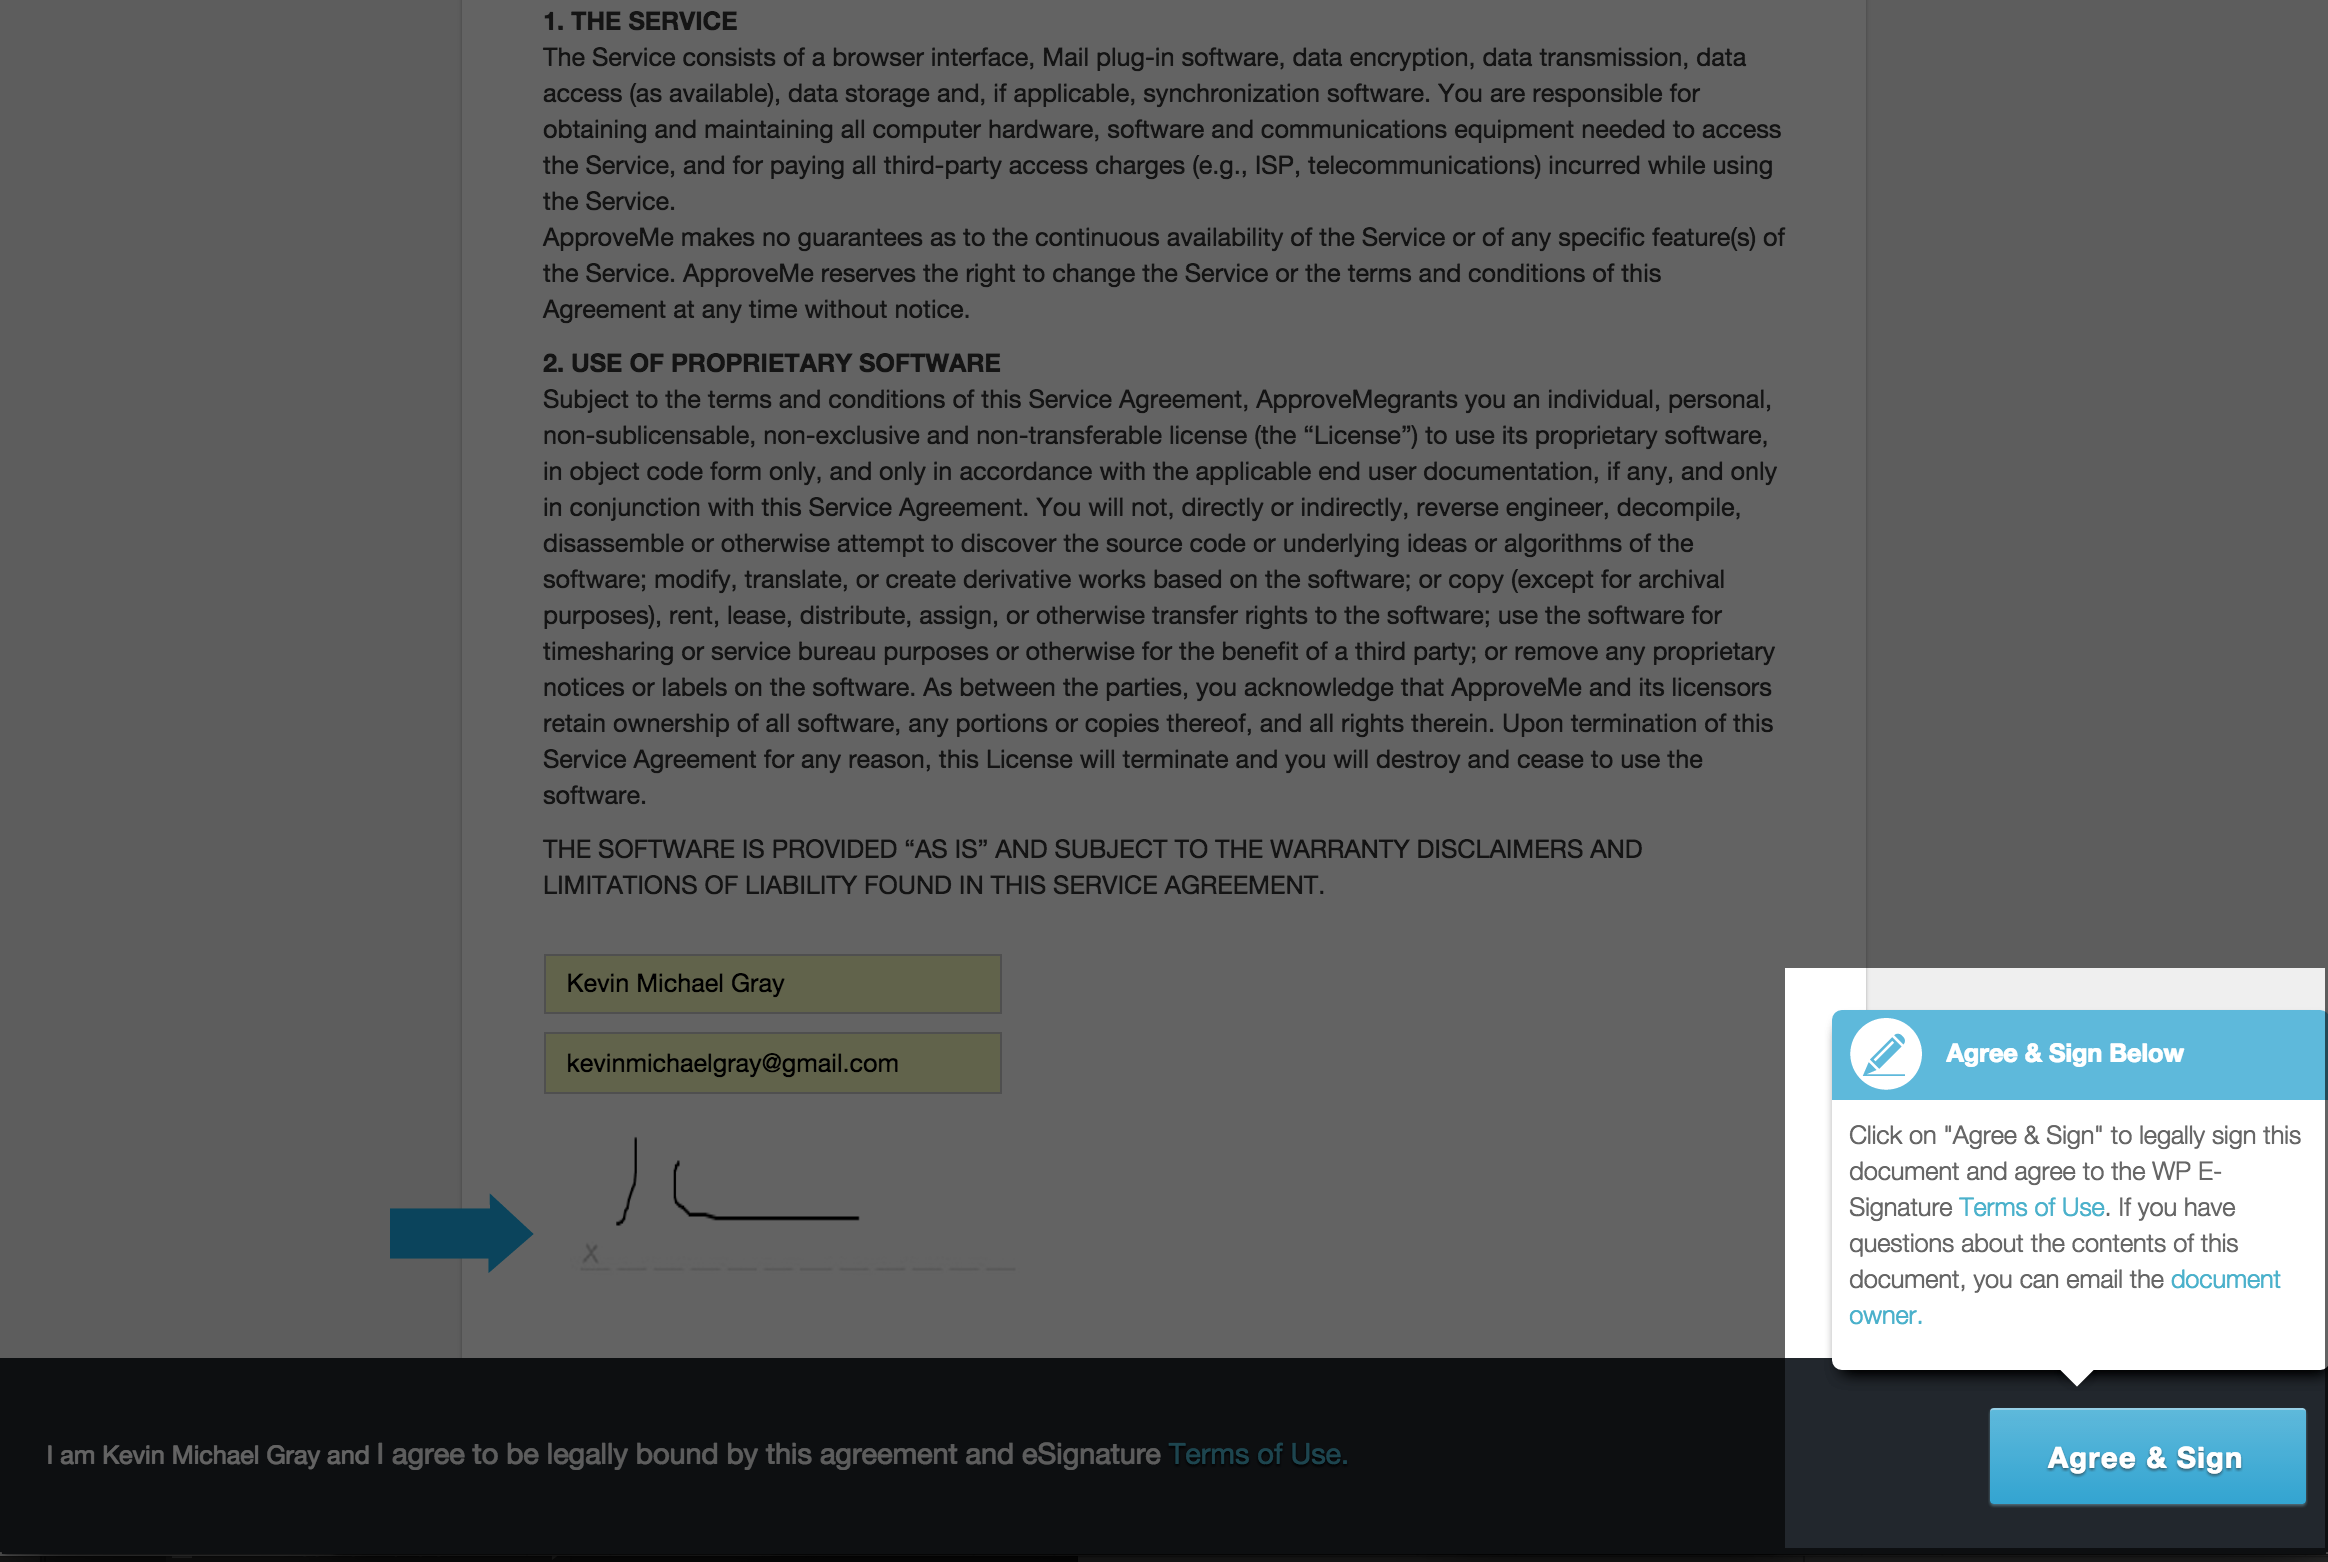
Agree & eSign:With their e-signature, the customers agree to the terms of the document
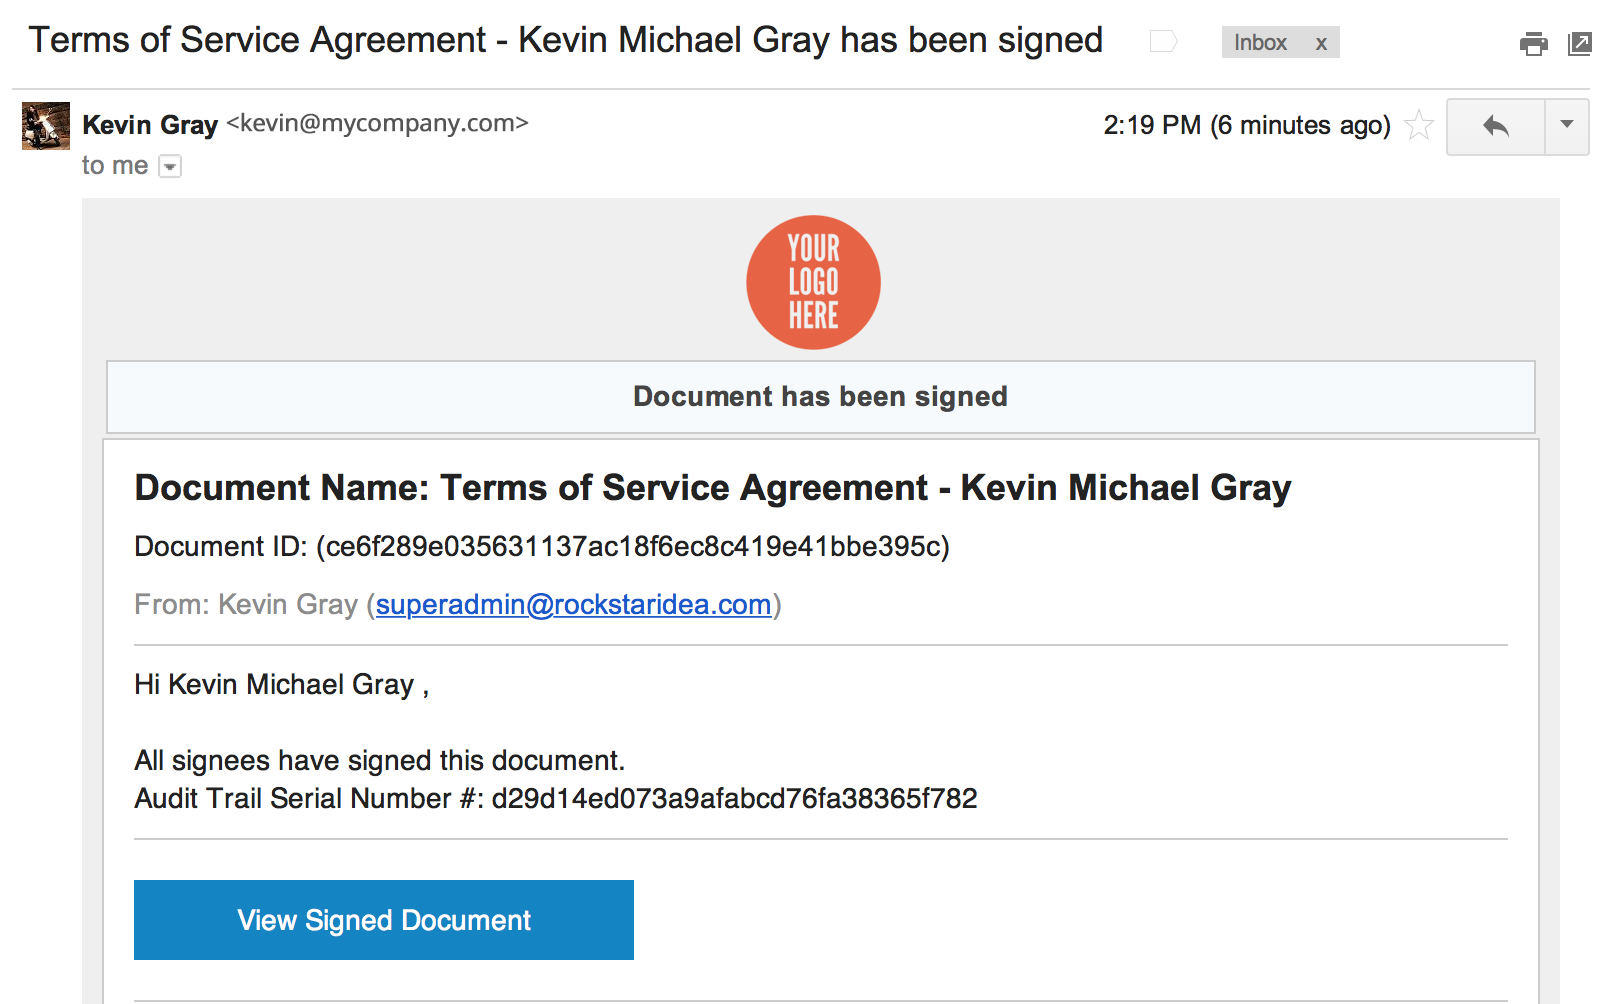
View Signed Document Email:Customers will be sent an email that includes the link to the document (and PDF if you opt for this method).
Save as PDF:Customers can either print or download their signed document from the website. To do this, they need to click “View Signed Document” from the link in the email they attained upon signing the document. With the Attach as PDF add-on install you could also automatically include thee signed contract as a PDF attachment in this email.
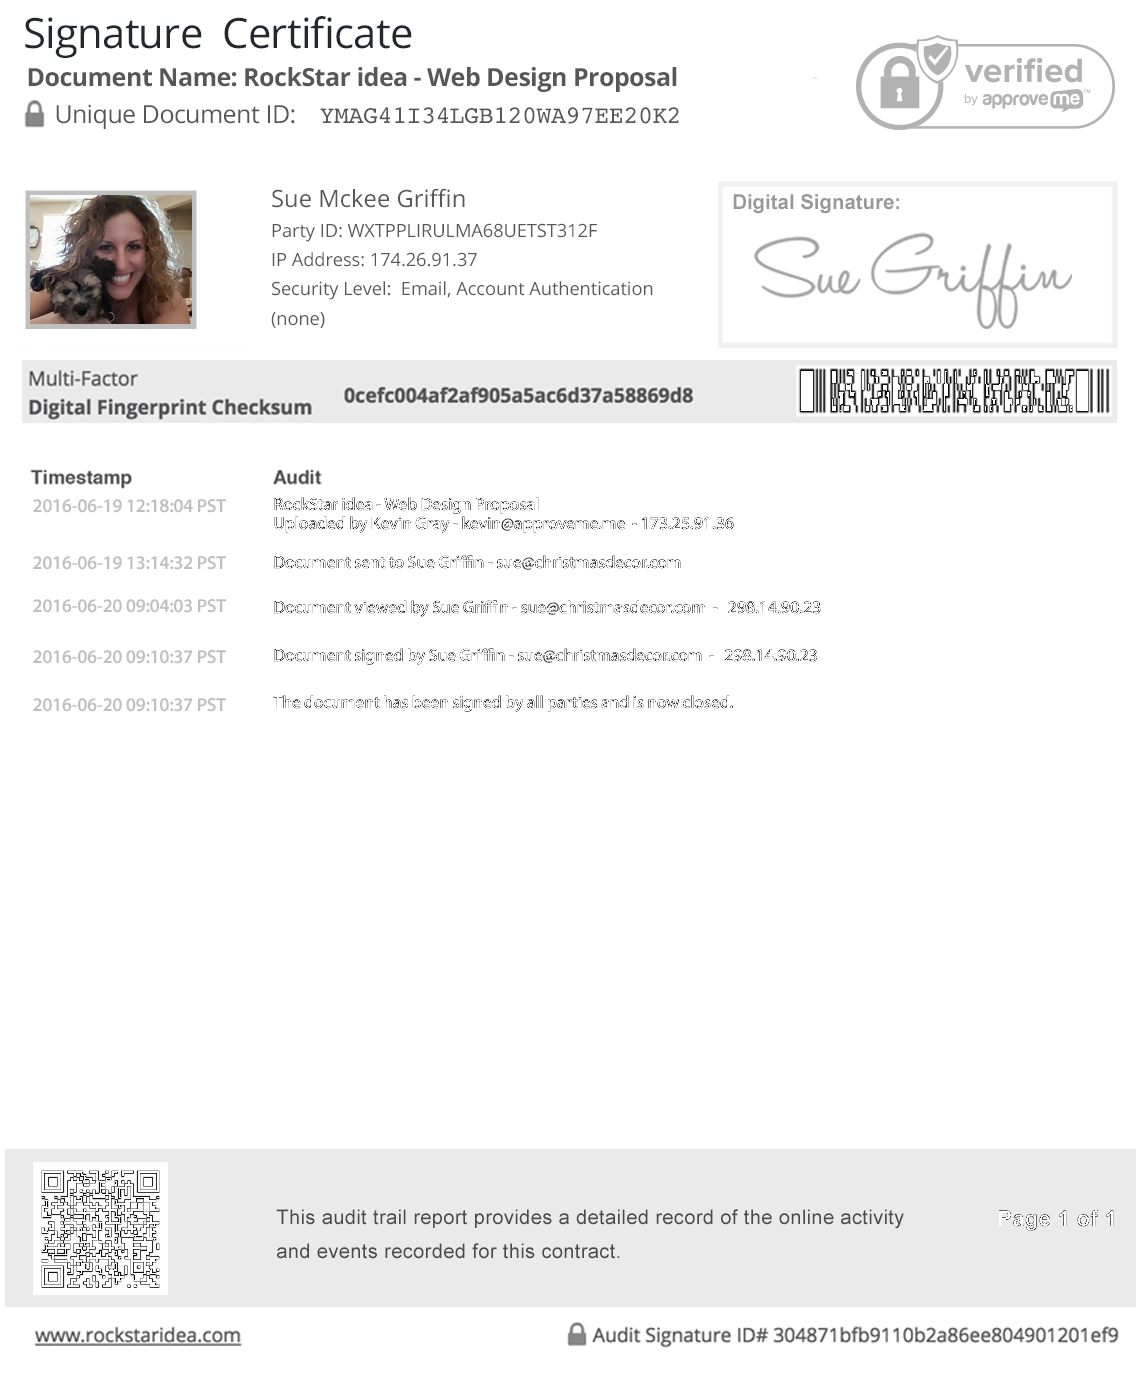
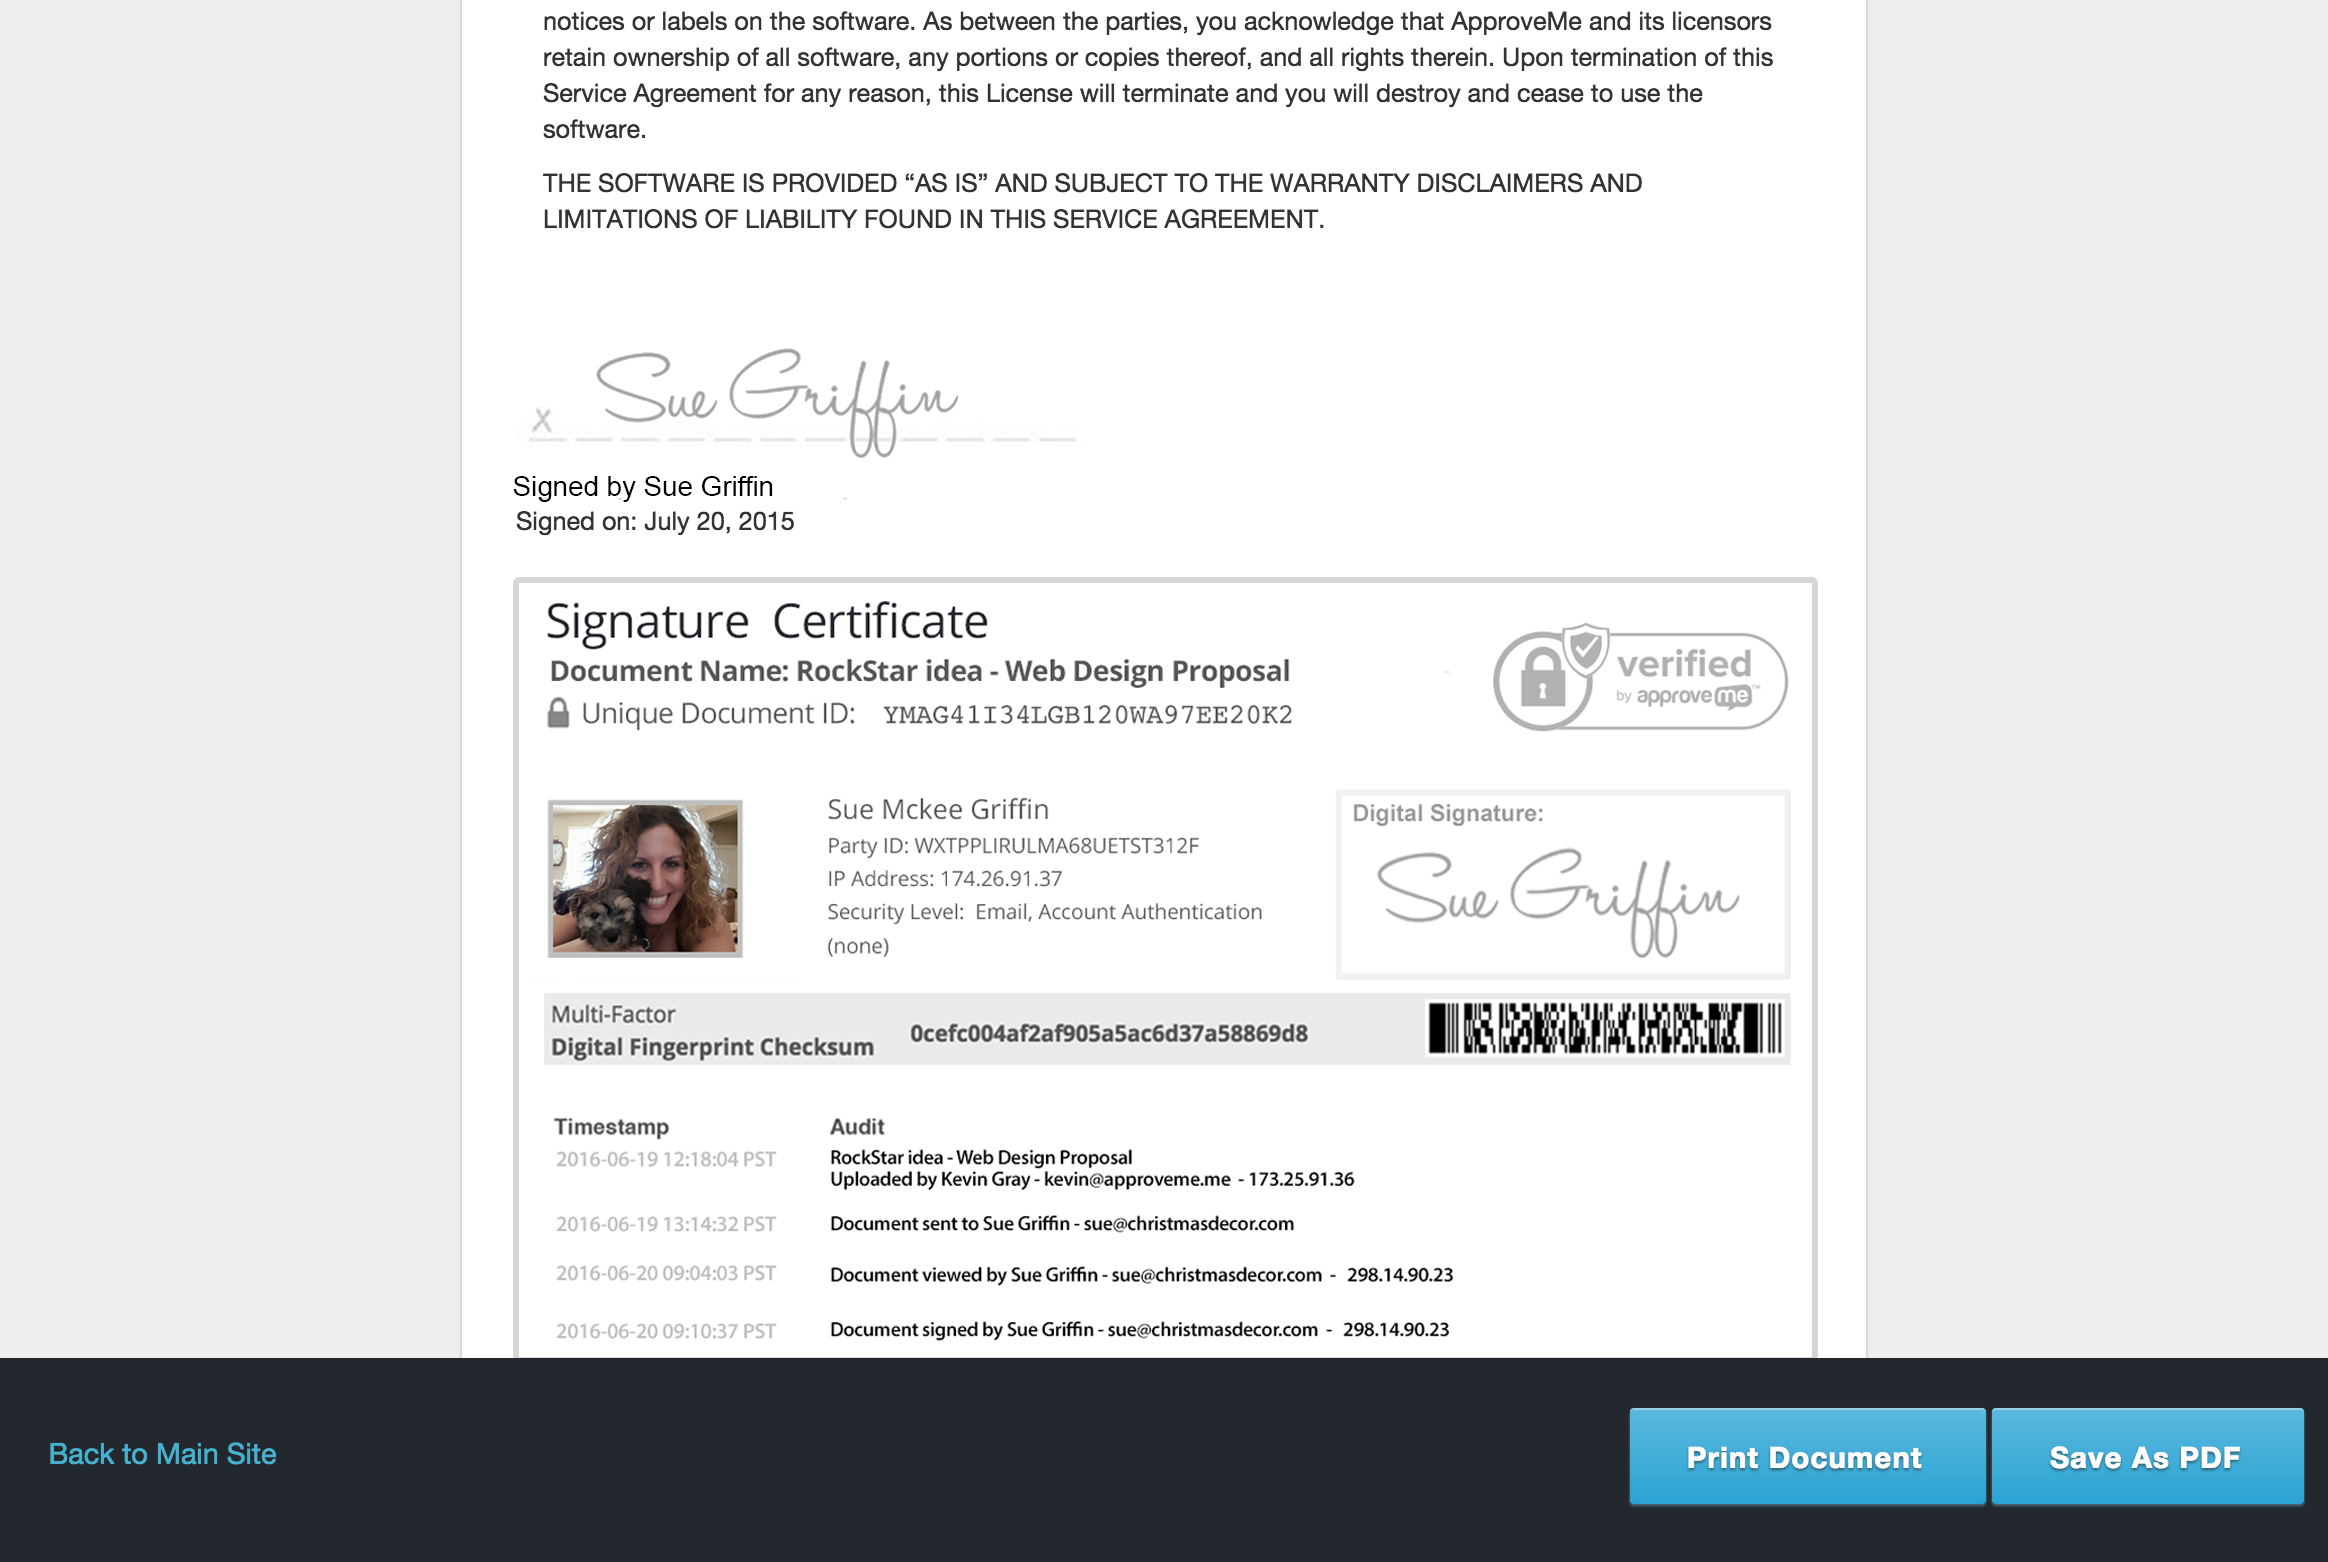
WordPress Audit Trail eSignature Certificate: Proving signer intent is a very important component to signing electronic documents. Every contract that is signed using WP E-Signature includes a detailed Signature Certificate. You can read all about the security of this report here.

Get Started With Free Trial
Explore the offer details: Discover it now


Ratings
Rating breakdown
Details Information
Version
First Released
Total Downloads
Wordpress Version
Tested up to:
Require PHP Version:
Tags
Contributors
Languages
The plugin hasn't been transalated in any language other than English.
DIRECTORY DISCLAIMER
The information provided in this THEME/PLUGIN DIRECTORY is made available for information purposes only, and intended to serve as a resource to enable visitors to select a relevant theme or plugin. wpSocket gives no warranty of any kind, express or implied with regard to the information, including without limitation any warranty that the particular theme or plugin that you select is qualified on your situation.
The information in the individual theme or plugin displayed in the Directory is provided by the owners and contributors themselves. wpSocket gives no warranty as to the accuracy of the information and will not be liable to you for any loss or damage suffered by you as a consequence of your reliance on the information.
Links to respective sites are offered to assist in accessing additional information. The links may be outdated or broken. Connect to outside sites at your own risk. The Theme/Plugin Directory does not endorse the content or accuracy of any listing or external website.
While information is made available, no guarantee is given that the details provided are correct, complete or up-to-date.
wpSocket is not related to the theme or plugin, and also not responsible and expressly disclaims all liability for, damages of any kind, arising out of the use, reference to, or reliance on, any information or business listed throughout our site.