Plugin / Image Hover Effects Ultimate – Captions Hover with Visual Composer Extension
Biplob Adhikari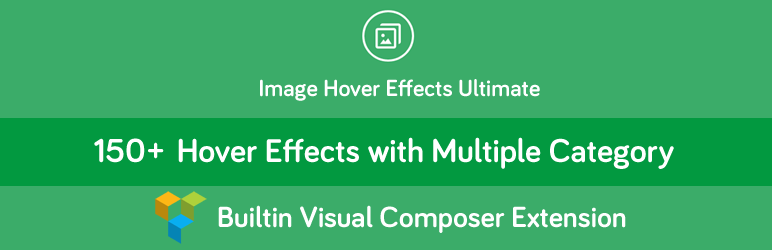
Installation
Installation
We’ve made it very simple and very easy to use. The installation process of this plugin is very easy. Those who are not even a regular user or even haven’t any prior experience can easily install our product on their WP dashboard. Nevertheless, for your convenience, we left an installation instruction over here:
=Option 1=
+ Download the plugin image-hover-effects-ultimate.zip from WordPress Plugin Directory.
+ Unzip the zip file and extract the plugin folder named image-hover-effects-ultimate.zip
+ Left that plugin folder into your wp-content/plugins folder.
+ Go and refresh your WordPress administration panels and from the menu bar click on Plugins.
+ Now you may see your plug-in listed under inactive plug-in tab.
+ Click active to turn your wordpress plugin on.=Option 2=
+ Like the first option you have to download the zip file from download location.
+ Unzip the zip file and extract the Image Hover Effects Ultimate plugin folder.
+ Double click on the installable folder in order to get image-hover-effects-ultimate.zip.
+ Go to wordpress admin panel and press Add New from the Menu bar under plugins tab.
+ Select upload link and drug the available image Hover Effects Plugin file and click install now.
+ After successfully installed finally click on ‘activate’ to turn on.
Let us know if you need any help, just open a thread into Support Forum. Don’t be hesitated to inform us about any Bugs or Conflict.
=Product Activation License=
On the Image Hover Effects Ultimate submenu, you’ll find a new option entitled “Product License”. Here you can Upgrade your free version plugin to Pro version. By submitting and activating the license key you’ll able to upgrade your plugin very easily from this option. Let’s see how to upgrade the plugin from Product License submenu.
Go to Product License submenu>> Enter the Product Key>> Click Save Changes button>> Now click on Activate license. That’s all! Now within few minutes you will get update notification to update your plugins. After Update you are able to access Pro features.
How to Start with Image Hover Effect Ultimate
We make Image Hover Effect Ultimate WordPress plugin very user friendly so that users can use it without having any trouble, rather they will find interest in it. Creating hovers item on an image is very simple and intuitive here with Image Hover Effect Ultimate. Also, the admin area of Image hovers effect ultimate contains inline information that describes you the settings and possibilities that the Image hover effect ultimate plugin offers. In this part we’re going to give you some instruction on how to start adding hover item to Image hover effect. So, let’s start:
- Click the Image Hover Effects Ultimate submenu entry entitled “General Effects”. This will take you to the image hover effect creation and editing page.
- Now select a Style from our template list.
- After selecting a style you’ll need to create a name of your selected style. Now click the Save button.
- Now click on Add New Items and upload a valid image.
At this point you will see the Hover Modification Form with 6 Field
- First field: “Your Title” You can enter any title, the important thing to remember is that the item width and height are limited so please enter a short title. This is important to maintain the layout of the image wrapper.
- Second field: “Your Description” You can quickly insert the description in the description text area. It is important to enter a short description to maintain the layout of the image wrapper.
- Third field: “Enter URL” Chose a button URL in this field. EX: https://www.oxilab.org
- Forth Field: “Bottom Text” adds bottom text here.
- Fifth Field: “Upload Image” to choose an image, the image can come from any source and be any size, you can also use images uploaded right from the post media Uploader. Just copy the URL of the image after you upload it.
- Sixth Field: “Hover Background Image” Here you can add an image for the hover background of the image.
Note Remember that you have to add a valid button URL (EX: http://google.com).
After adding a style and upload an image for making hovered item you can generate the shortcodes to your site post or page. Follow these instructions below:
- Go to Dashboard.
- Click Add New Post or page.
- In your Post/Page Editor you will see a Black down arrow box within your editor.
- Put Any Title On Title field.
- Copy & Paste the Shortcode from the plugin.
- Click Publish.
=Customizable=
Your WordPress website represents you, your brand or your company. Image Hover Effects Ultimate allows you to create your plugin, exactly as you would like. You can customize the selection and settings of color, background, borders and edges, and more. The editing interface of General Effects contains four different customizing sections. There are general, heading, description and button text modification section. Let’s discuss more about the settings of those sections…
=General Settings=
- Image per Row Here you can select the image number you want to show in a single row of the page. You can add highest 6 items per row. This will give you the extra convenience to work with multiple images on one page.
- Image Radius Image Radius allows you to customize the image type. You can get a rounded shape image by increasing the value. With 50% radius value you can get a circle image. And if you need a full square image customize that here.
- Image Width & Height You can customize the image width and height here.
- Image Margin Image Margin is designed for making the distance between image to image. The proper setting of this option your image hover gallery will have more attractive and neat look.
- Content Padding This padding option is for generating the space around the image content.
- Background This option is for those who don’t want to upload any image to set as hover background. They can pick a color for their image hover background in this option.
- Content Alignment You can customize the aligning option of the image content here.
- Open in New Tab Here you can set the direction of your image link opening. Whether you can set the link to open in a new tab or the existing tab.
- Image Animation You can select the animation style of your image hover. Here we left the bounce, fade in, flippers, light speed, rotation entrance, sliding entrance, zoom entrance and some special style effect.
- Animation Duration Here you can set the timing of the animation. You can choose the animation duration here with this option.
- Content Animation Like image animation you are able to add and customize the animation for the content. This option will allow you to choose the animation style for image hover content.
- Inner Shadow Add some shadow to the image inner portion with this option. This feature will help you to make your image more attractive and colorful.
- Inner Shadow Color Give some color to your image inner shadow to make the shadow visible to the viewers.
=Heading Setting=
- Font Size This option will help you to customize the font size of the content heading. You can customize the heading font size of the image hover with this option.
- Font Color You can choose a color for the font from the color picker in this option.
- Font Family You can use Google font-family to add your preferred font for the heading. Creating all this you will have the original Image Hover with pretty content.
- Font Weight Font weight is for customizing the weight style of the heading font. This is a free feature for decoration the image hover content heading.
- Heading Underline By customizing the font style you can make your image content look more attractive. Heading Underline will add the heading an extra new look and also give the text some focus.
- Padding Bottom By generating the space between the heading content and underline you can decorate the heading much prettier.
- Margin Bottom This option is for creating the margin to having some space between heading text and description text. Like padding bottom this option is also a free option.
=Description Settings=
- Font Size This option will help you to customize the font size of the content description. You can customize the description font size of the image hover with this option.
- Font Color You can choose a color for the description text from the color picker in this option.
- Font Family You can use Google font-family to add your preferred font for the description text. Creating all this you will have the original Image Hover with pretty content.
- Font Weight Font weight is for customizing the weight style of the description text. This is a free feature for decoration the image hover content description.
- Padding Bottom By generating the space between the description content and bottom text you can decorate the image hover content section much prettier.
=Button Text Settings=
- Font Size This option will help you to customize the font size of the content button text. You can customize the button text font size of the image hover with this option.
- Font Color You can choose a color for the button text from the color picker in this option.
- Font Family You can use Google font-family to add your preferred font for the button text. Creating all this you will have the original Image Hover with pretty content.
- Background Color This option is for customizing the background color of the button text. You can select a color balancing out the hover background color, opacity and the opacity of the button text.
- Font Weight Font weight is for customizing the weight style of the button text. This is a free feature for decoration the image hover content button.
- Hover Color When you hover over the button the color you select from this option will be appeared on the image. This option is for customizing the hover color of the button text.
- Hover Background You can customize the hover background color of the button text here.
- Button Radius If you want to give a rounded shape to your image button then increase the value here. This is a free version feature.
- Padding Top Bottom To make a bigger or smaller button, customers the Padding top bottom option. This will increase the space at the top, bottom side of the button.
- Padding Left, Right To make a bigger or smaller button, customize the Padding left right option. This will increase the space at the left and right side of the button.
- Button Align Customize the button alignment to accurate the button text position in your image. Set the relevant position in the image.

Get Started With Free Trial
Explore the offer details: Discover it now

Ratings
Rating breakdown
Details Information
Version
First Released
Total Downloads
Wordpress Version
Tested up to:
Require PHP Version:
Tags
Contributors
Languages
The plugin hasn't been transalated in any language other than English.
DIRECTORY DISCLAIMER
The information provided in this THEME/PLUGIN DIRECTORY is made available for information purposes only, and intended to serve as a resource to enable visitors to select a relevant theme or plugin. wpSocket gives no warranty of any kind, express or implied with regard to the information, including without limitation any warranty that the particular theme or plugin that you select is qualified on your situation.
The information in the individual theme or plugin displayed in the Directory is provided by the owners and contributors themselves. wpSocket gives no warranty as to the accuracy of the information and will not be liable to you for any loss or damage suffered by you as a consequence of your reliance on the information.
Links to respective sites are offered to assist in accessing additional information. The links may be outdated or broken. Connect to outside sites at your own risk. The Theme/Plugin Directory does not endorse the content or accuracy of any listing or external website.
While information is made available, no guarantee is given that the details provided are correct, complete or up-to-date.
wpSocket is not related to the theme or plugin, and also not responsible and expressly disclaims all liability for, damages of any kind, arising out of the use, reference to, or reliance on, any information or business listed throughout our site.